
Create a VPC in VCF 9: Public and Private Subnets
Follow VCF 9 VPC configuration with public and private subnets, DHCP tests, external IP assignment and virtual machine connectivity checks.
Overview
This VCF 9 VPC configuration walkthrough creates public and private subnets, tests DHCP allocation and assigns an external IP to a virtual machine. Deploy the NSX Edge nodes before following these steps in vCenter.
Create the VPC
With the edge node deployed, we can now enable the Virtual Private Cloud or VPC capability within the environment. We start by logging into the vCenter server.
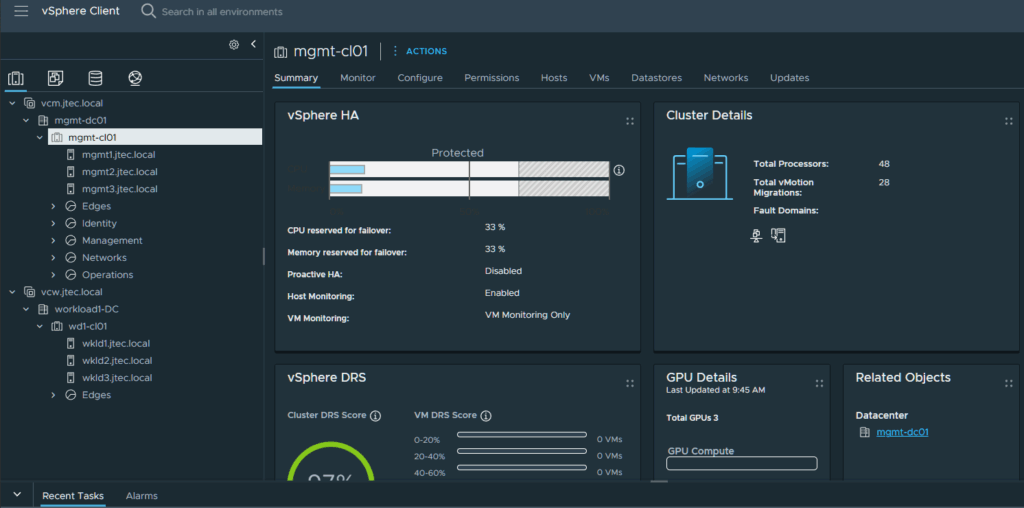
Click on the Networking icon.
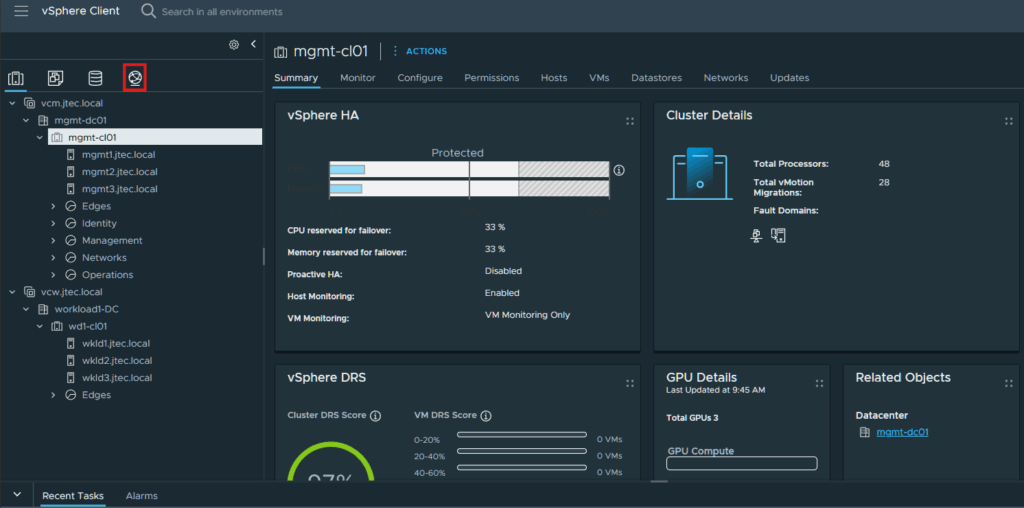
Select Virtual Private Clouds and click Add VPC.
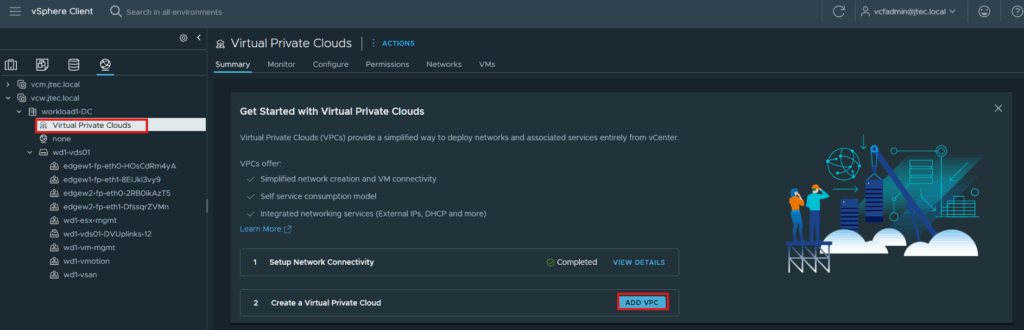
Enter in a name for the VPC and a Private IP CIDR for the VPC to use for communications. Click Save to complete.
We can see our VPC has been created.
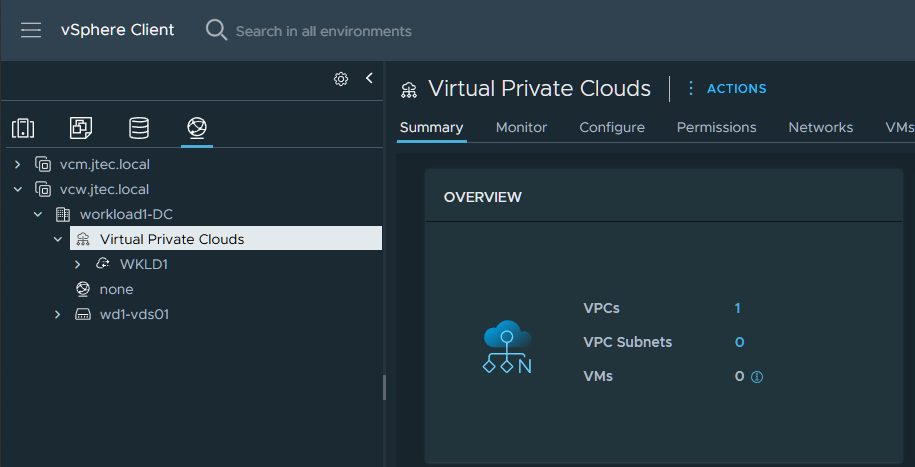
Create the public subnet
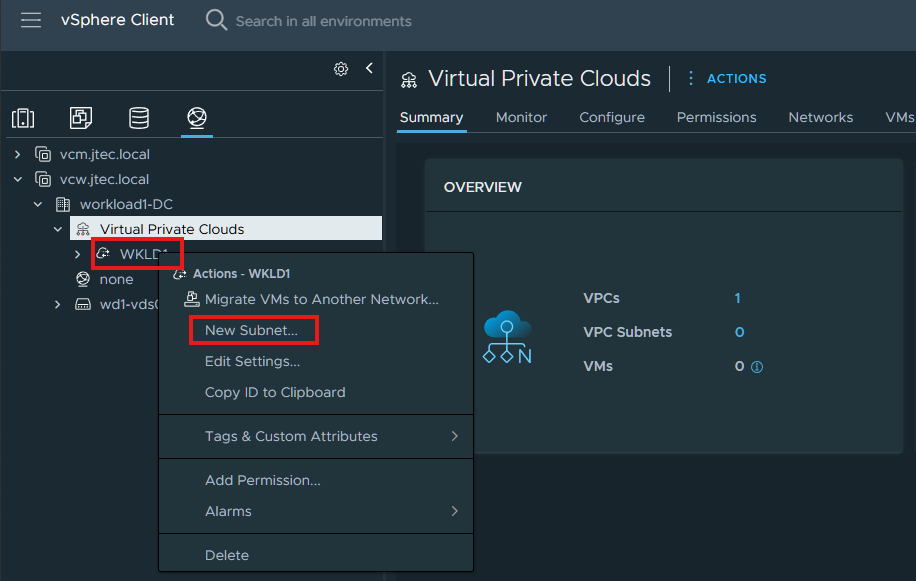
Now we need to create a few VPC subnets, right click on the VPC and select New Subnet.
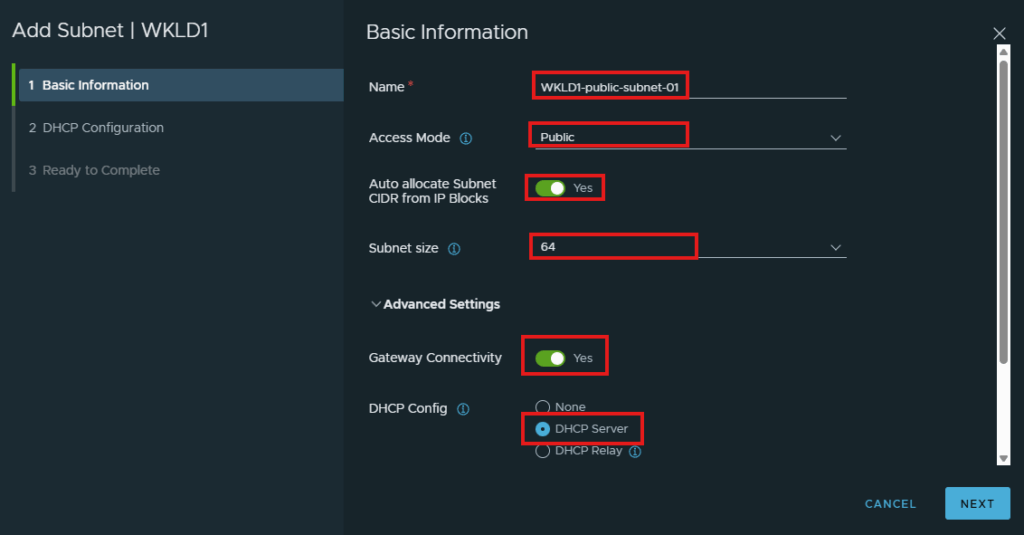
The first subnet will be a public subnet which will be using DHCP and will allocate address from the External IP Block we created during the NSX Edge deployment. Enter in a name for the subnet, change the access mode to Public, provide a subnet size and click advanced settings to configure the DHCP config. Click Next when all the information has been entered.
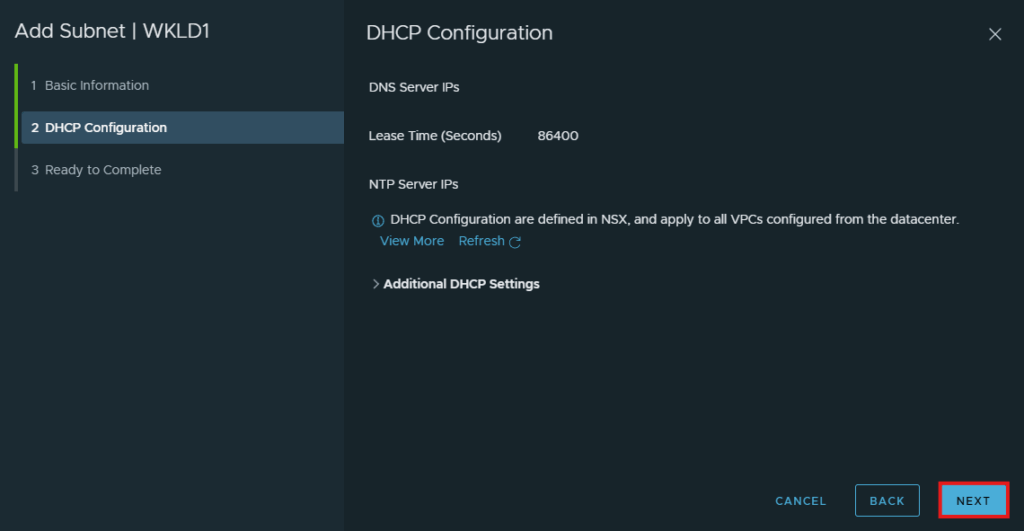
Click Next to continue at DHCP Configuration.
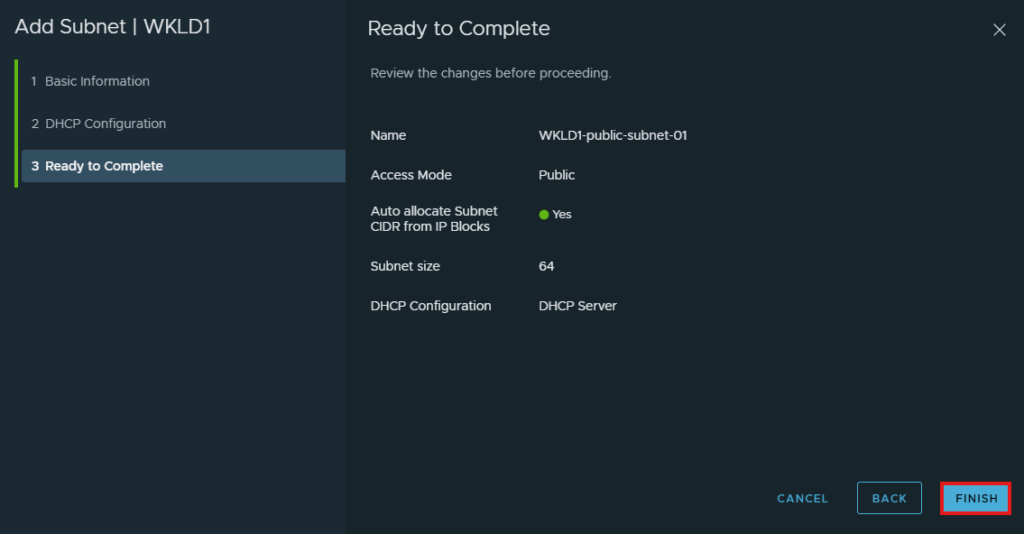
Click Finish.
Create the private subnet
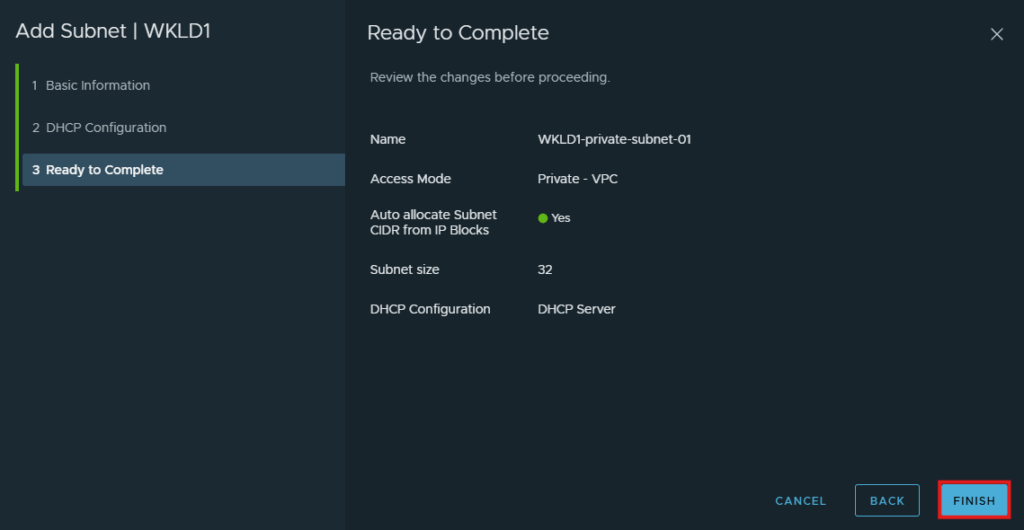
Now we will create a private subnet that will also be using DHCP and allocate address from the private CIDR we provided during the VPC creation.
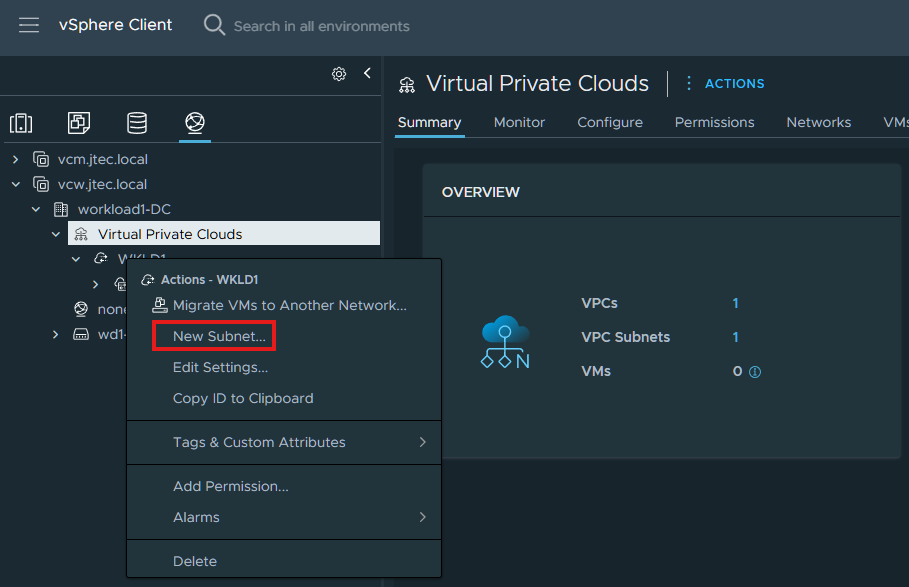
Right click on the VPC again and select New Subnet
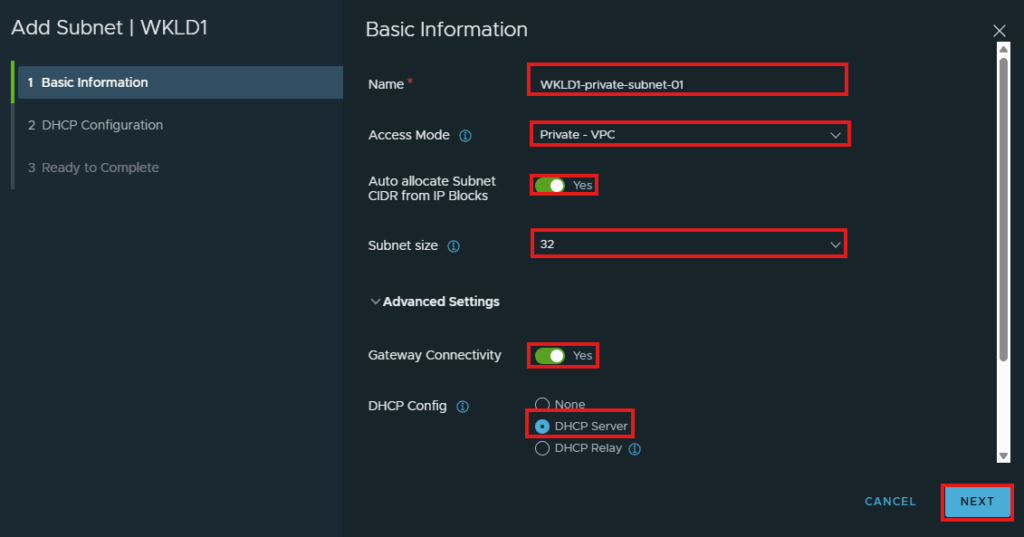
Enter in the subnet name, access mode, subnet size and click Advanced settings to configure the DHCP settings. Click Next after entering the subnet information.
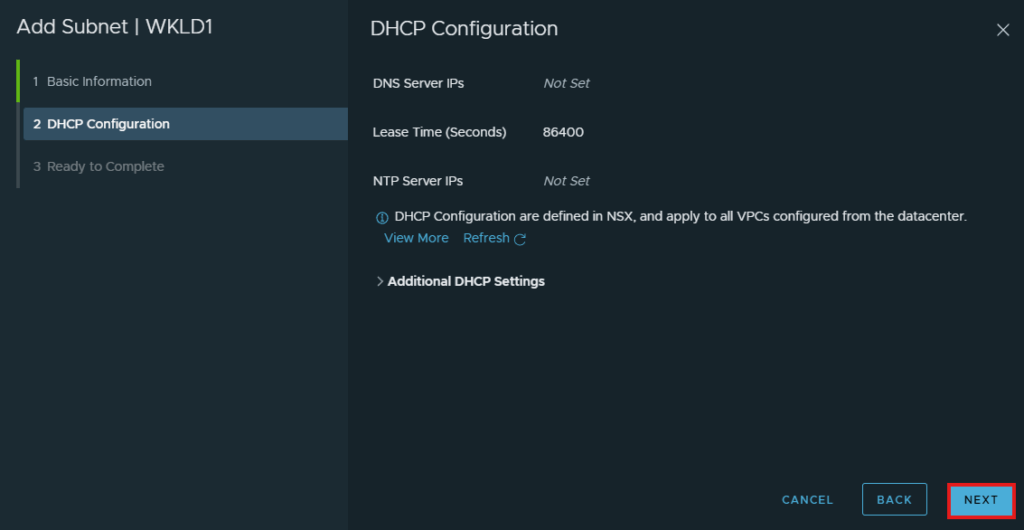
Click Next at the DHCP Configuration.
Click Finish.
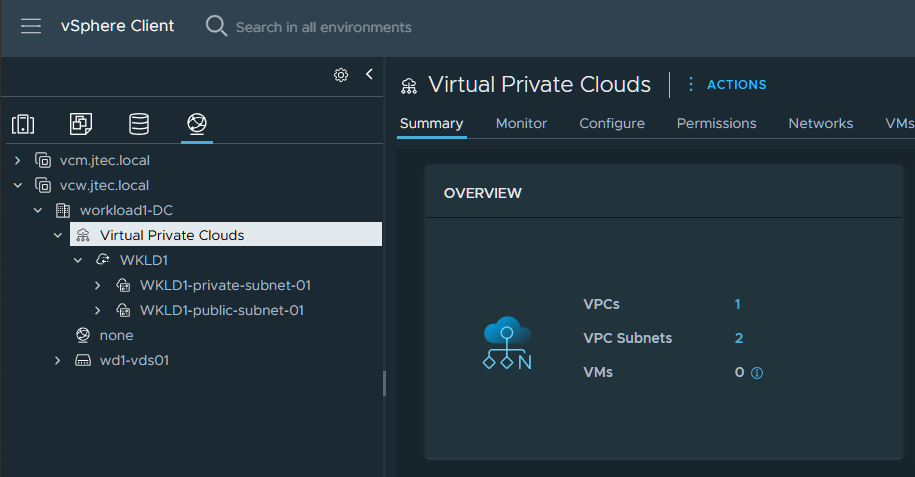
We can now see both subnets created and VPC has been configured.
Test DHCP allocation
Now let’s create a couple VMs to ensure that our DHCP settings are working for both subnets. I have a test Photon OS virtual machine already deployed on this workload domain and will just be cloning that.
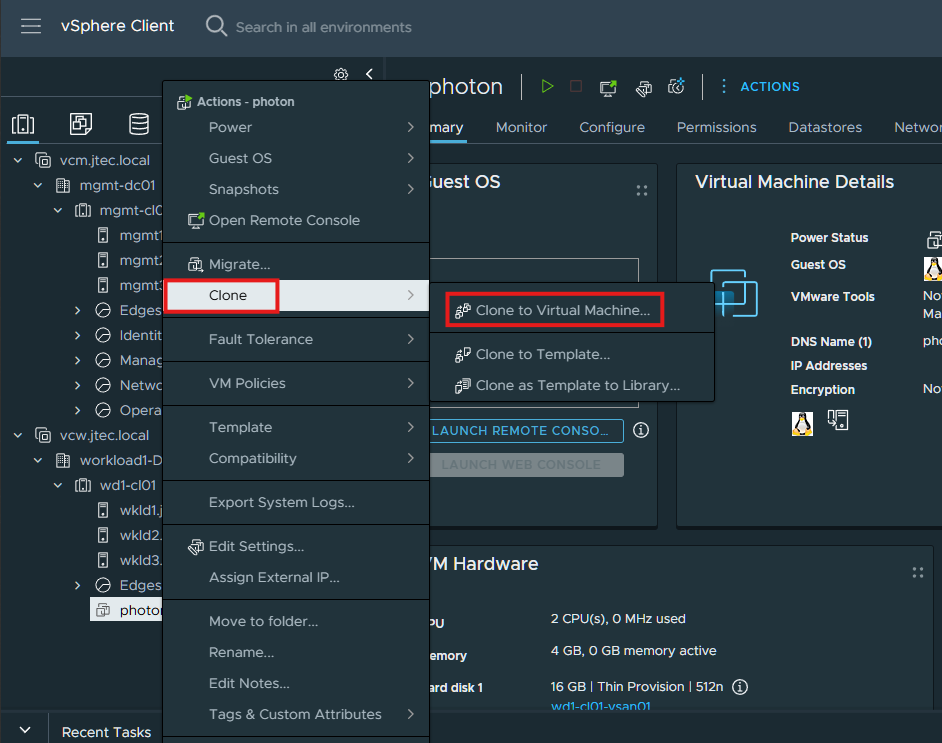
In the vCenter, I am right clicking on my photon vm and selecting Clone > Clone to Virtual Machine
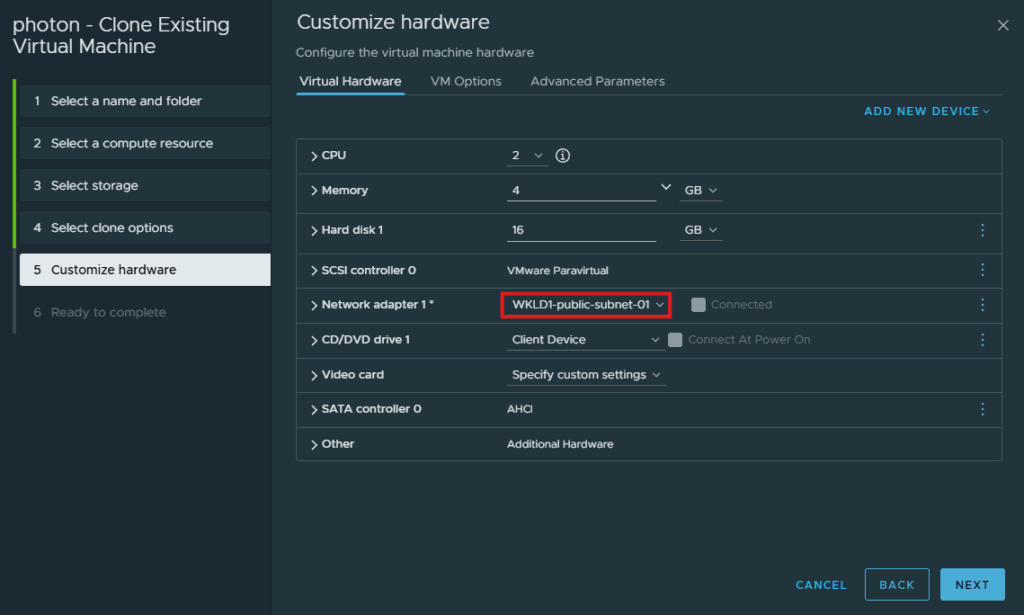
During the cloning process, I will select the check box to customize the virtual machine hardware and use the public VPC subnet for the network adapter.
Once that is cloned and powers on, we can validate the subnet works if a DHCP address is assigned to the virtual machine.
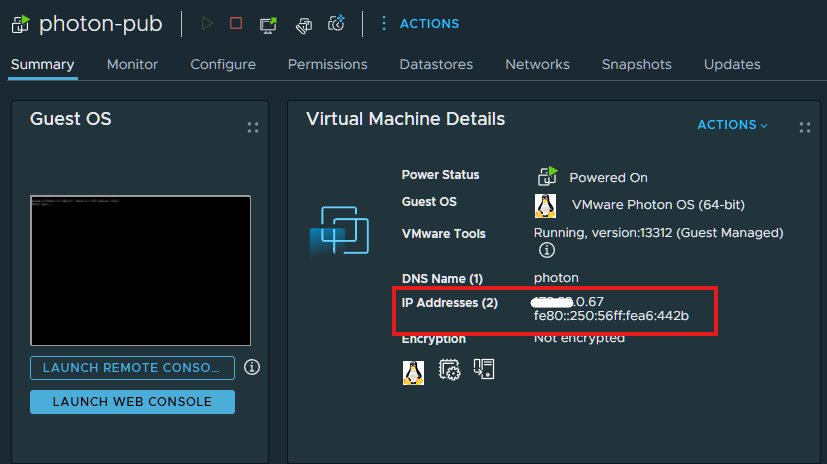
I repeated the cloning process and used the VPC private subnet for that virtual machine, after it powered on an IP was assigned from the private subnet.
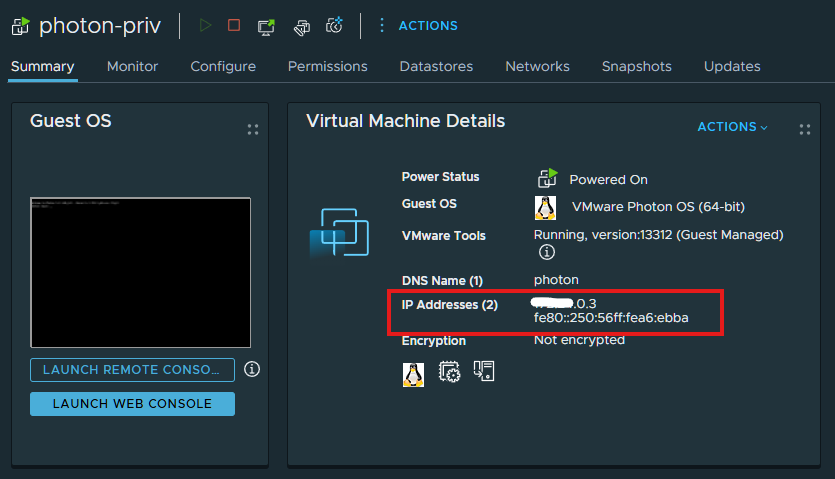
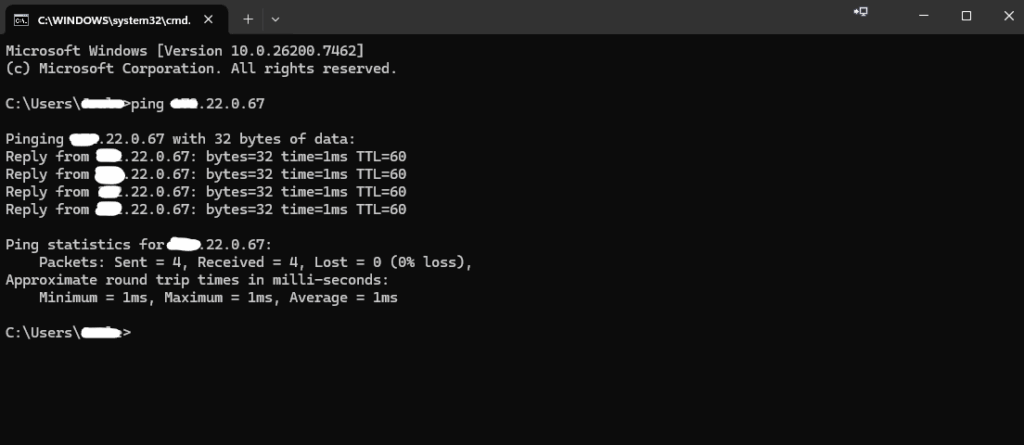
So our VPC is configured and working properly. Since I have BGP setup in my environment, I should now be able to reach these VMs as well from my workstation. I ran a ping in my command prompt to the virtual machine that is connected to the public subnet and that worked.
Assign and test an external IP
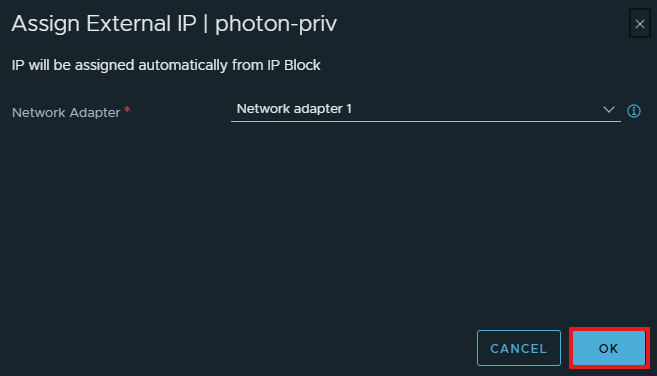
Since the other virtual machine is connected to the private subnet, we have to assign and external IP to it in order for us to reach it. We accomplish this by right clicking on the VM and selecting Assign External IP.
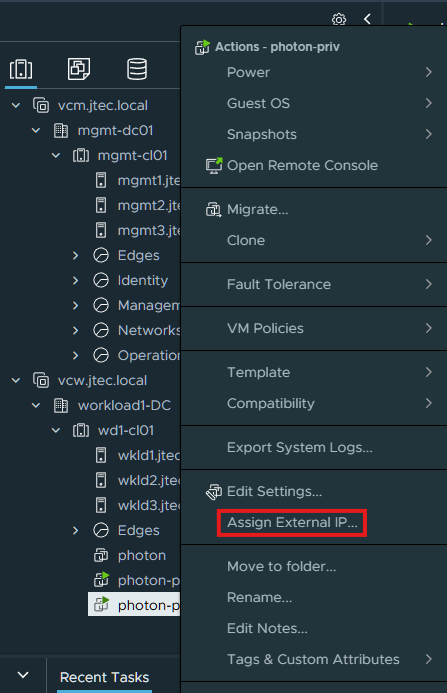
It will ask which network adapter to assign it to, as I only have a single network adapter that is selected by default. Click Ok to finish.
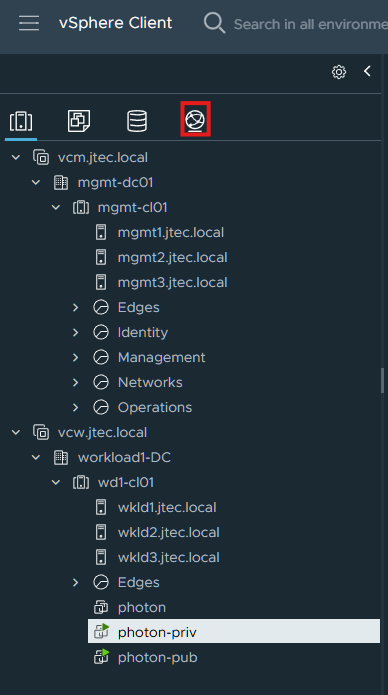
To view what IP address was assigned, we click on the Network icon in the vCenter server.
Click on the private subnet, then Configure > External IPs
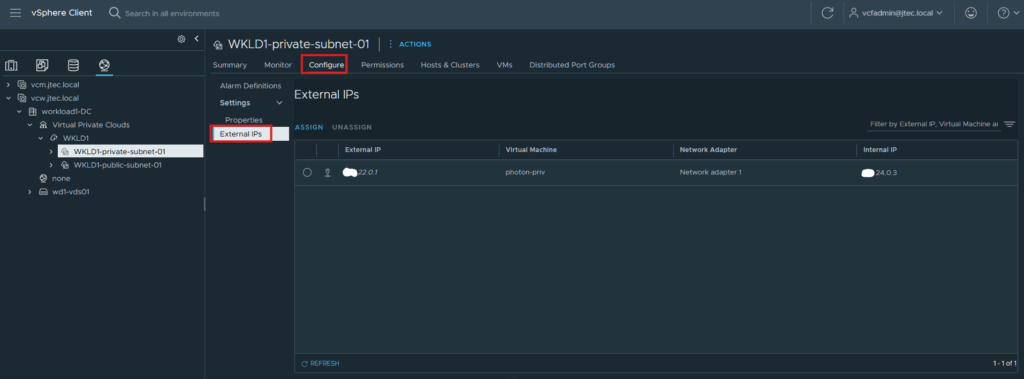
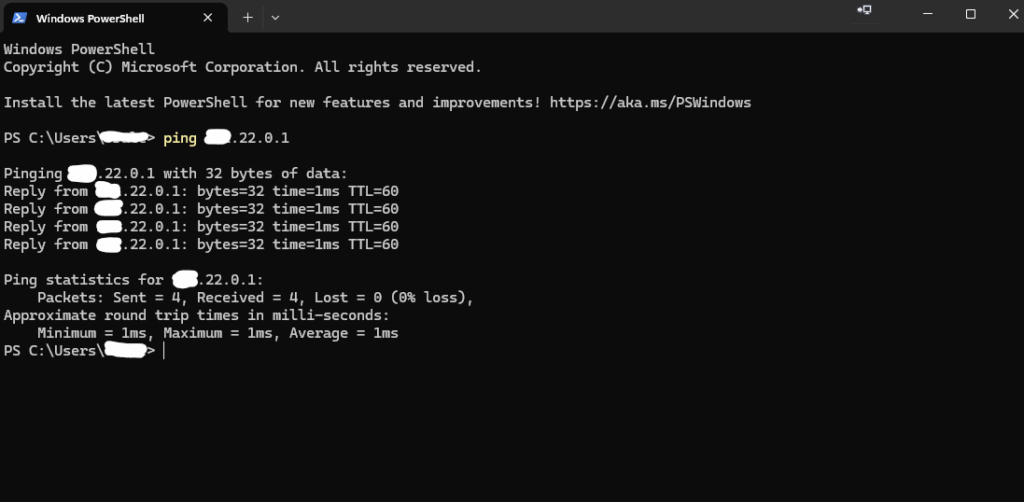
We can see the assigned external IP now, and running a ping command again to confirm connectivity to this vm and that was successful.
We have completed the Virtual Private Cloud (VPC) deployment on this environment and everything is working.
Follow along with my VMware Cloud Foundation 9 deployment here.