
Deploy the VCF Automation Appliance with Fleet Management
Walk through VCF Automation appliance deployment using Fleet Management, with certificate, infrastructure, network and precheck configuration.
Overview
This VCF Automation appliance deployment walkthrough uses Fleet Management after my VCF management domain is already running. It covers the certificate, infrastructure, network and precheck inputs; initial Automation configuration and SSO follow separately.
Prepare the deployment inputs
The screenshots use VCF Automation 9.0.0 with the Small deployment type. Treat the displayed names and placement as lab examples, not universal sizing recommendations. Before opening the wizard, collect these inputs for your selected release and topology:
- Software and placement: installation version and deployment type, available install binaries, target vCenter, cluster, datastore, network, folder and resource pool. Check capacity against the selected deployment profile.
- Names and addresses: product FQDN, domain/search path, subnet and gateway, DNS servers, and the cluster VIP and node IP pool requested by the wizard. Reserve distinct unused addresses for their respective roles; do not assume the screenshot values fit another topology.
- Certificate and credentials: a certificate whose names cover the endpoint FQDN and the required appliance credentials. The generated self-signed certificate shown below is the initial lab choice; establish the appropriate trust before using the service.
- Network services: working DNS, reachable NTP and the management connectivity required by the deployment. Check forward and reverse records. If using a DNS-server VIP, Broadcom KB 438655 identifies mismatched A/PTR records for that VIP as a cause of Automation DNS precheck failures.
Start the Automation deployment
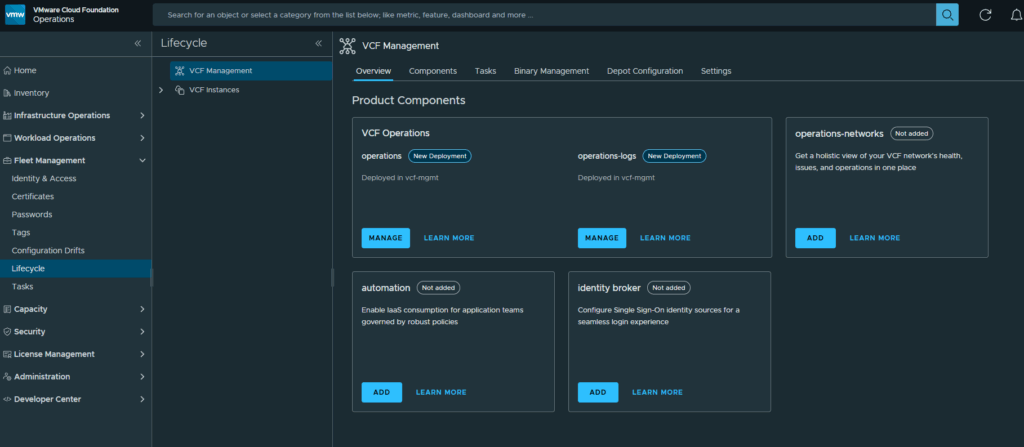
Login to your VCF Operations web gui and select Fleet Management and click on Lifecycle
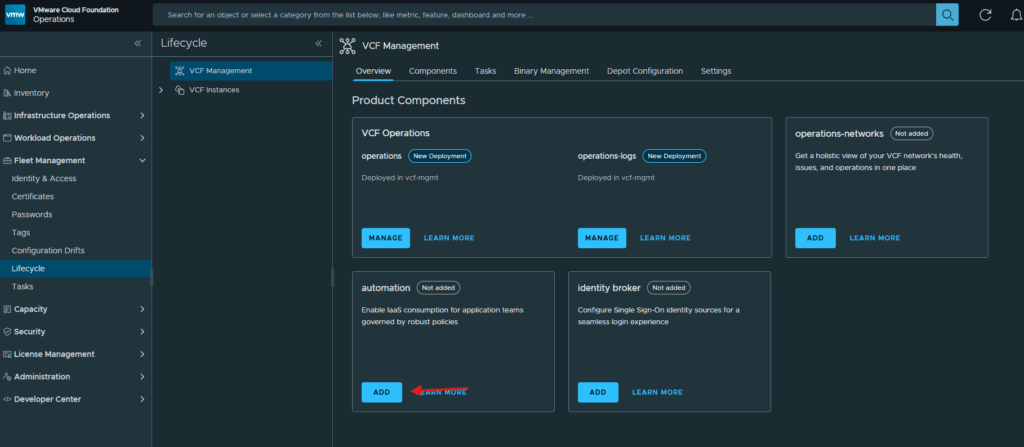
Click on Add under the automation box
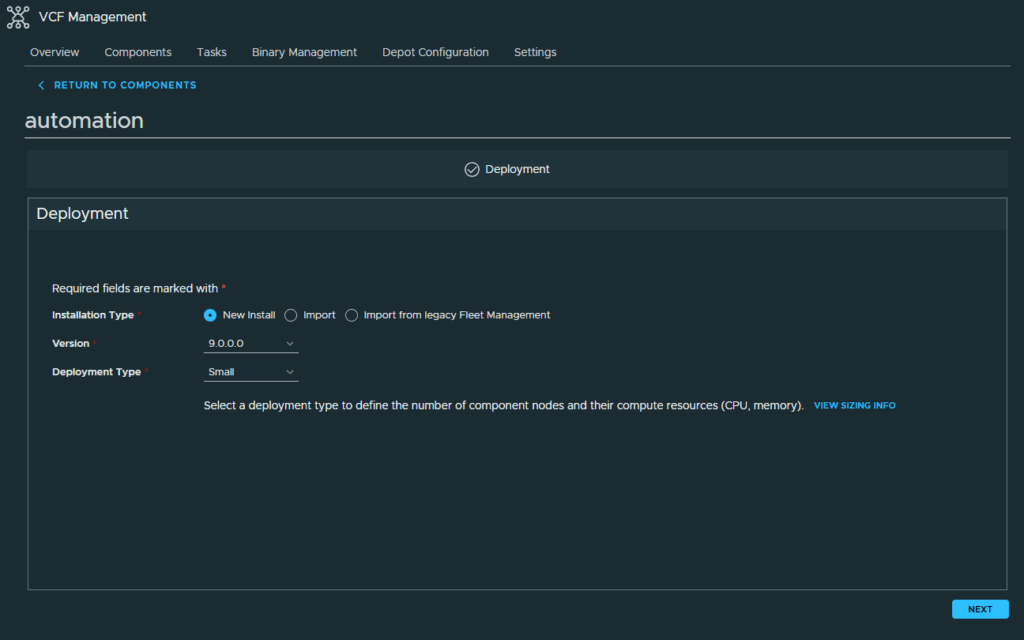
At the Deployment screen, select the installation type, version and deployment type. Then click Next
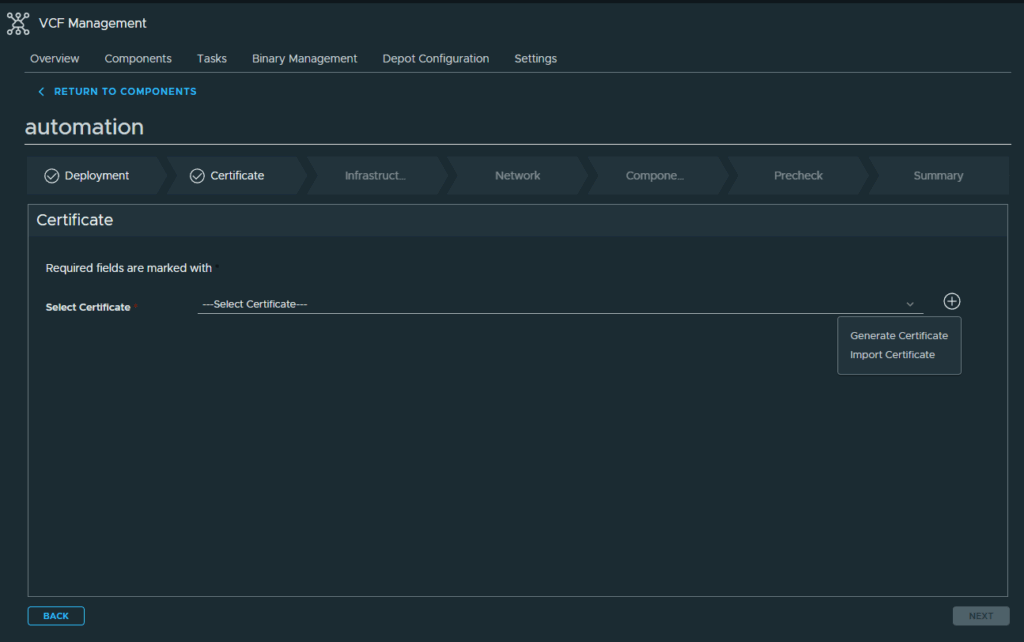
Configure the certificate
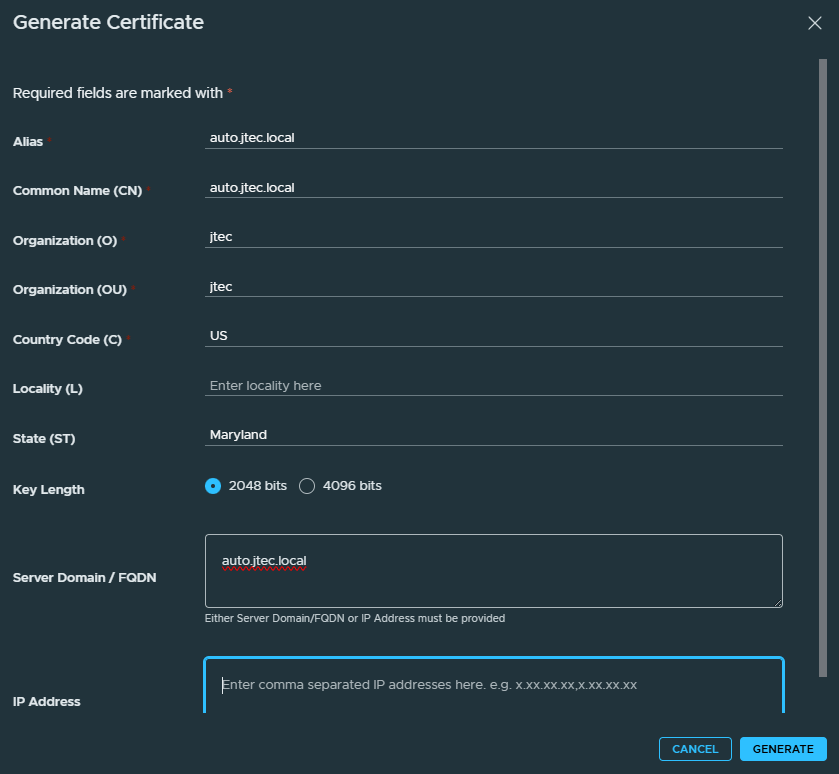
I am going to generate a self-signed certificate for this initially, click the Plus sign and select Generate Certificate
In the Generate Certificate pop-up, enter in the required information and click Generate
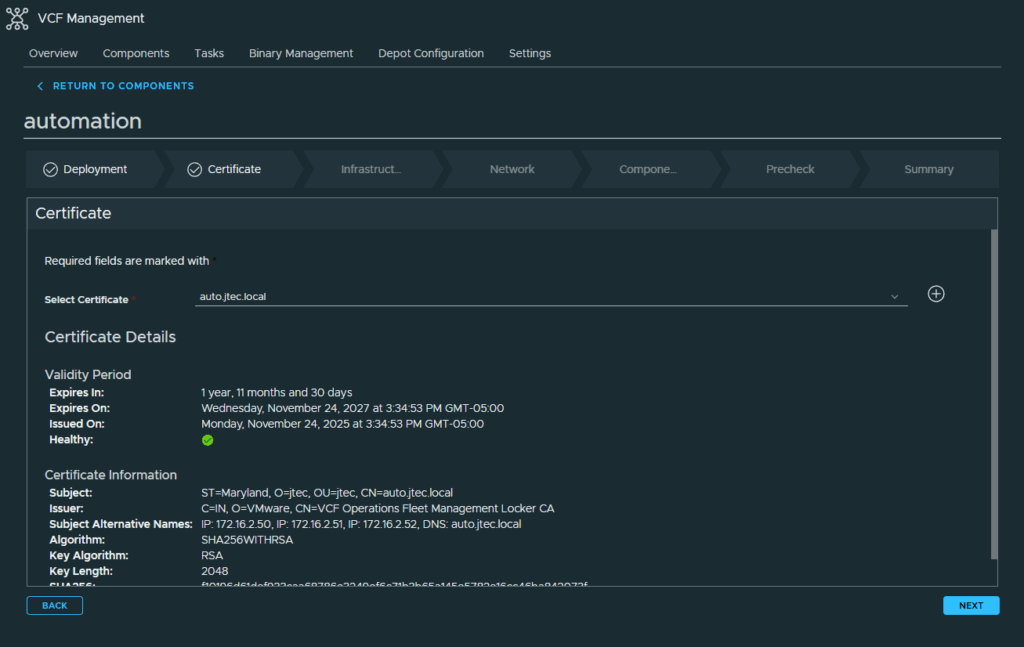
Click the drop-down to select the automation certificate and click Next
Configure deployment inputs
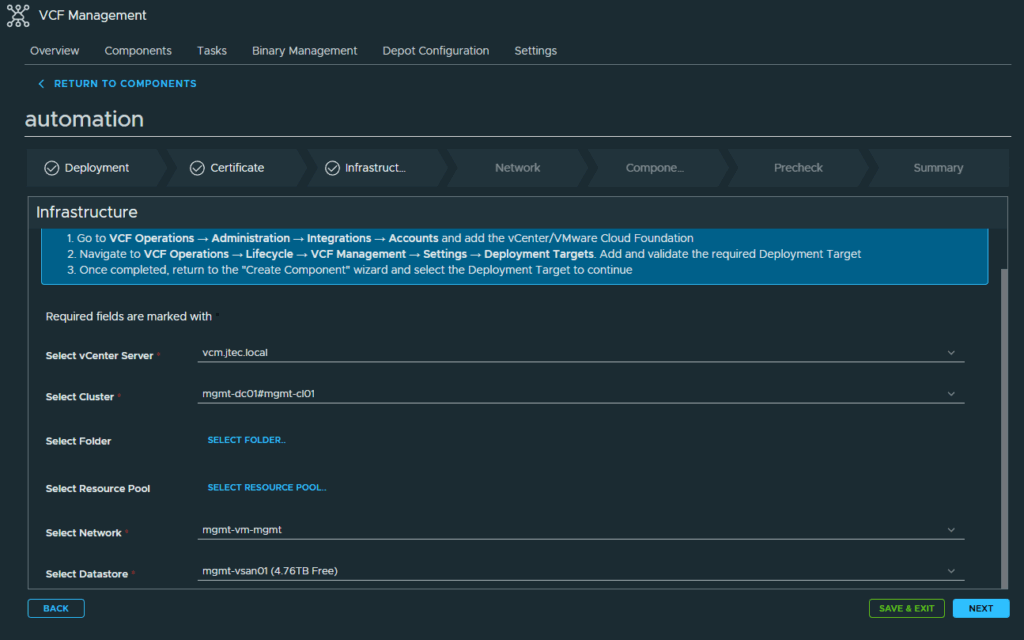
At the Infrastructure screen, select the deployment requirements and click Next
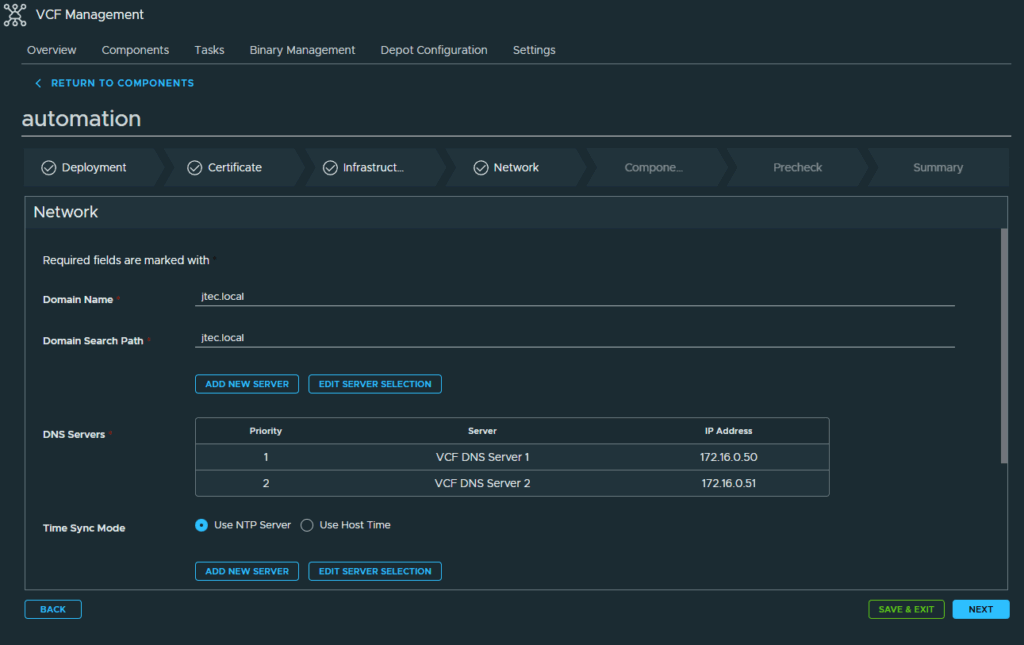
In the Network screen, enter in the required domain, ntp and subnet information. Click Next to continue
At the Components screen, enter in the relevant FQDNs, cluster VIP, Node IP Pool and additional required information. Click Next to continue to the PreCheck screen.
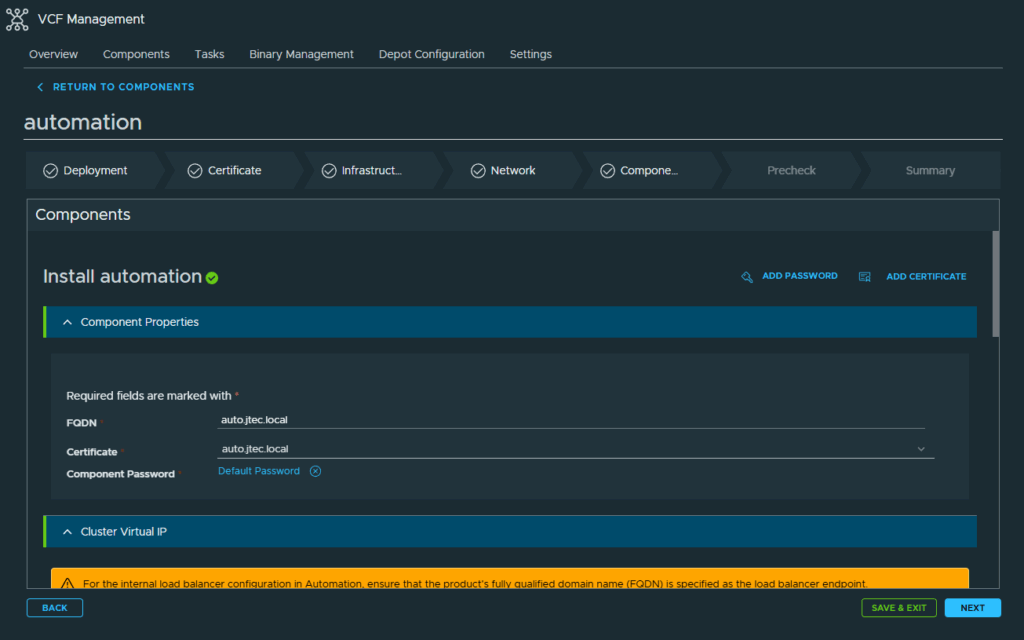
Validate and deploy
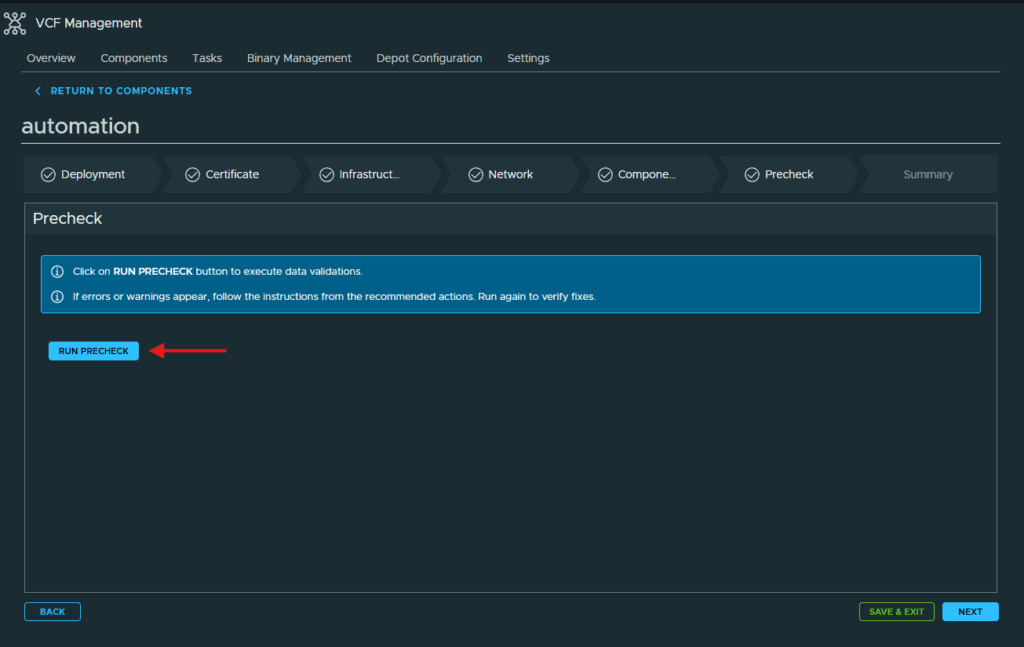
Click Run Precheck to validation all the information you entered is correct
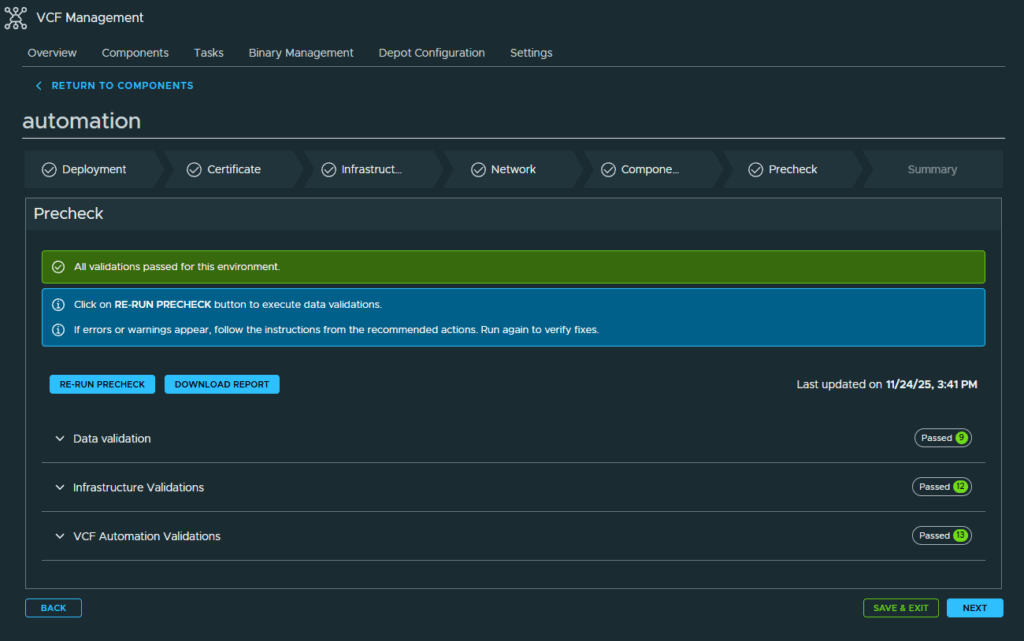
Once the Prechecks have passed, click Next to continue.
At the Summary page, review the information you entered just as a final validation as any changes after the fact may require a re-deployment. Click Submit to start the deployment.
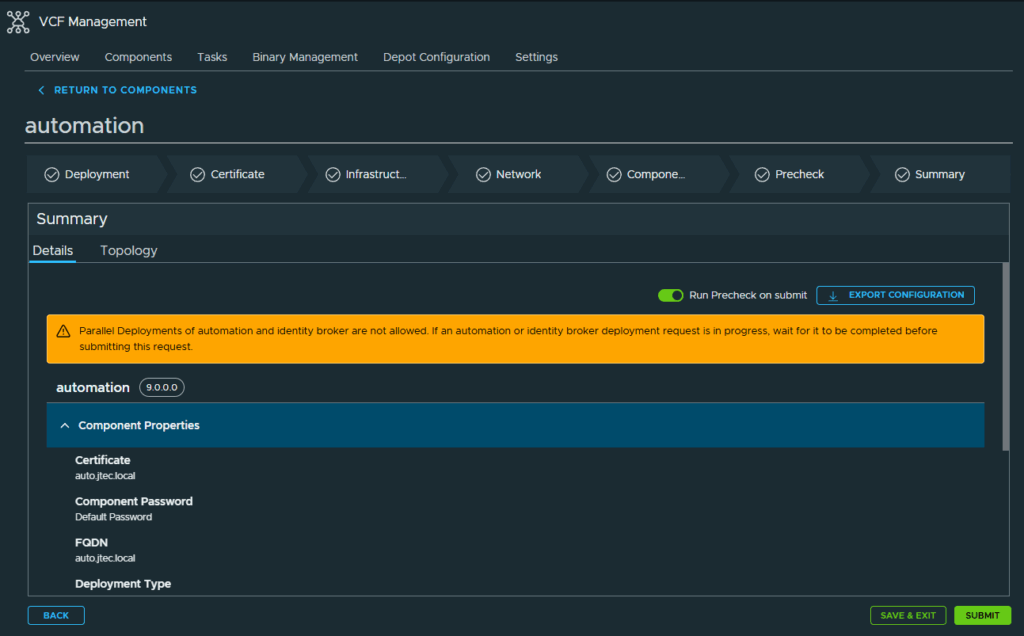
The deployment will run another Precheck and then begin deploying VCF Automation. Depending on your backend architecture this could take quite a bit of time to finish.
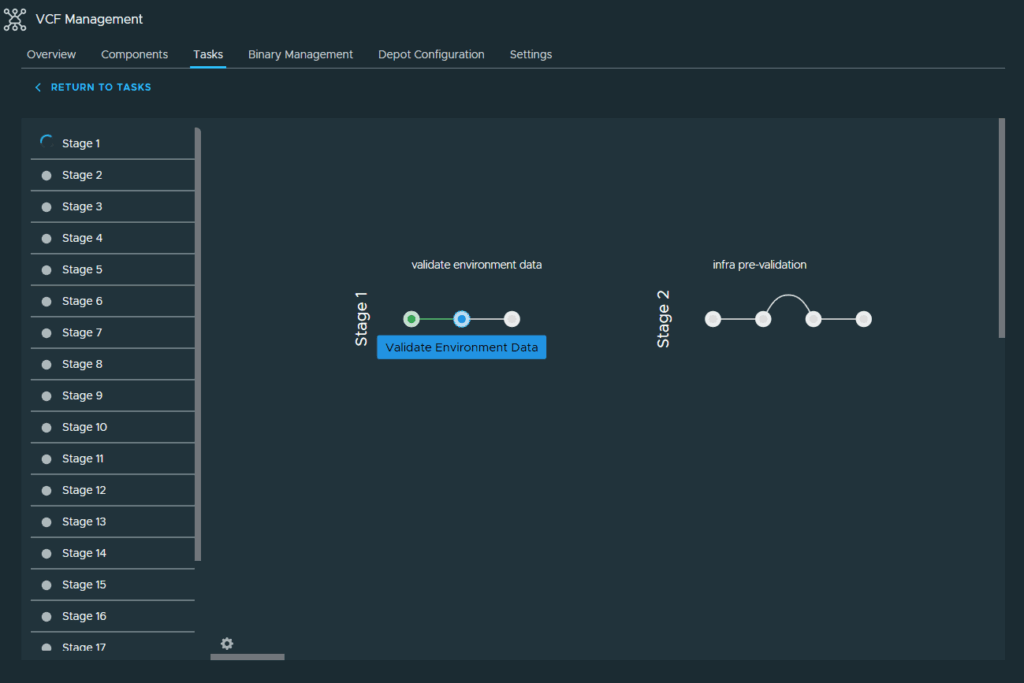
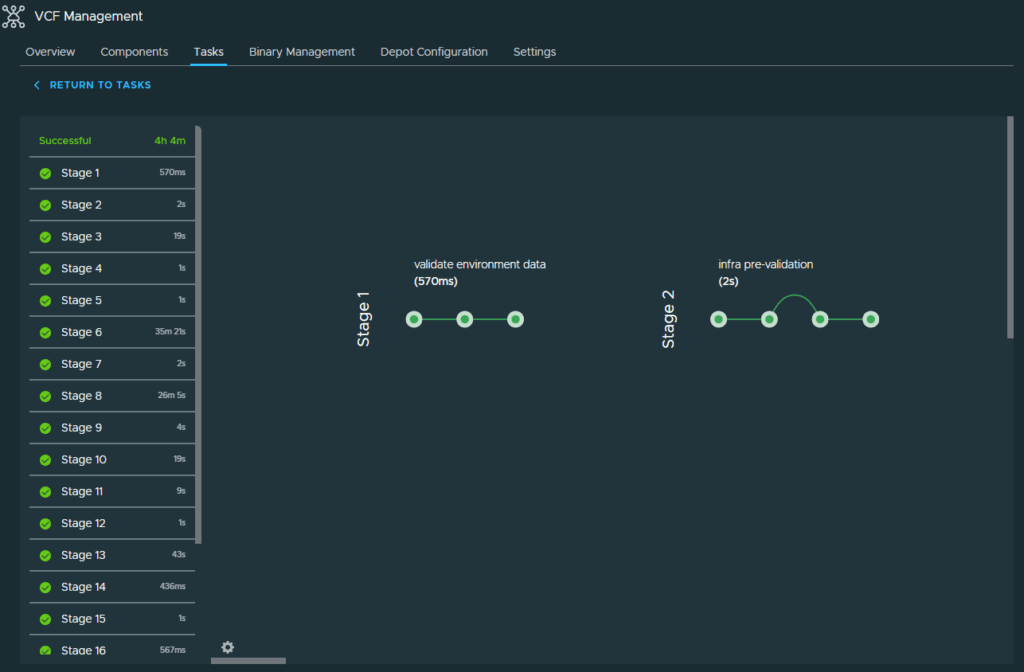
With the deployment successful, I will move on to deploying the other components of VCF
You can return to my main VCF Lab page to follow along with this deployment.
Expected precheck and completion results
- Before submitting, review the Data, Infrastructure and VCF Automation validation groups. Resolve failed checks, review warnings and rerun the precheck after corrections; the screenshot above shows all three groups passed.
- Review the final summary and avoid running Automation and Identity Broker deployments in parallel, as the displayed warning states.
- After submitting, inspect the task and its individual stages until the deployment reports success. A running task or completed precheck is not a completed deployment.
- Open the Automation endpoint by its configured FQDN, verify its certificate and continue with initial configuration and SSO. Deployment success does not establish that a user can provision a workload.
These are checks for readers to perform. The existing task screenshot records a successful deployment in this lab, but this editorial update did not repeat the deployment or validate provisioning.