
VMware vSphere Foundation (VVF) is the other option that is available from VMware for those who do not want the full private cloud experience. To learn more about the differences, visit this site.
Some of my customers will run this type of configuration so I like to run a nested variation of this in my lab in case I need to do any troubleshooting or testing outside of my physical VCF architecture. So with that I wanted to provide a walkthrough on how I set this up. If you have not worked with nested esxi hosts before there is some backend configuration that must be done on your physical hosts first.
You will want to visit these posts for more information on how I have setup my physical environment
Networking Subnet
Nested Subnet
Nested Host Switch
VyoS Virtual Router
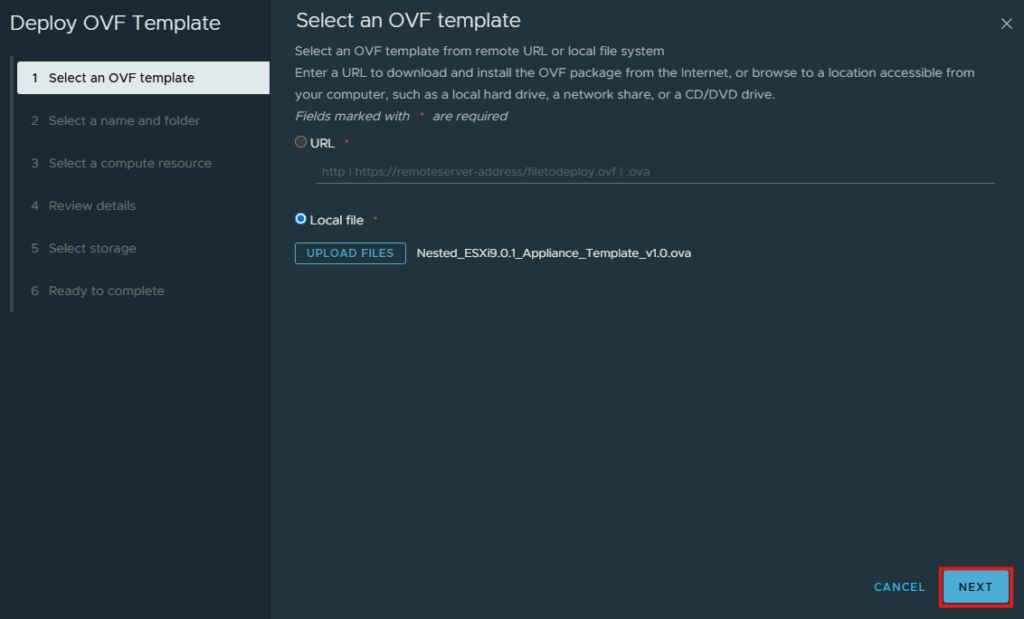
You will also need to download the nested esxi OVA file from the Broadcom support site It is listed under Flings, the direct link is below:
***Also remember to have DNS records configured for the 3 nested esxi hosts, vcenter and vcf operations.***
The first thing we need to do for this setup is to deploy the virtual appliances needed to make up the VVF domain. I am going to deploy 3 nested esxi hosts for this, start by logging into the vCenter web gui.
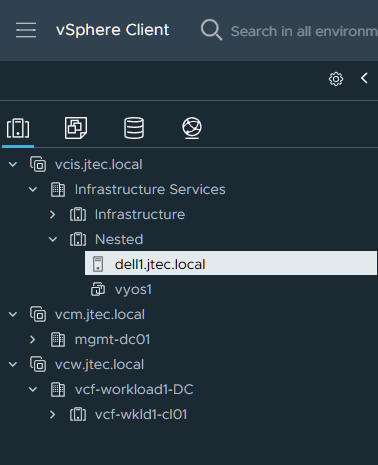
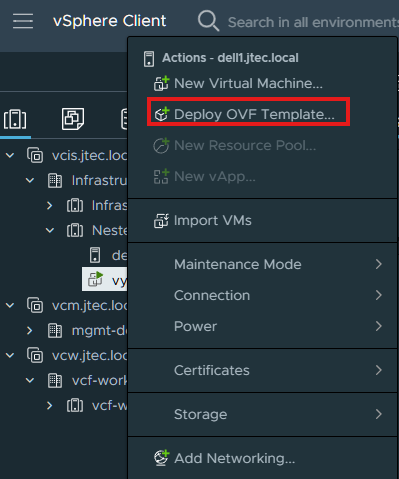
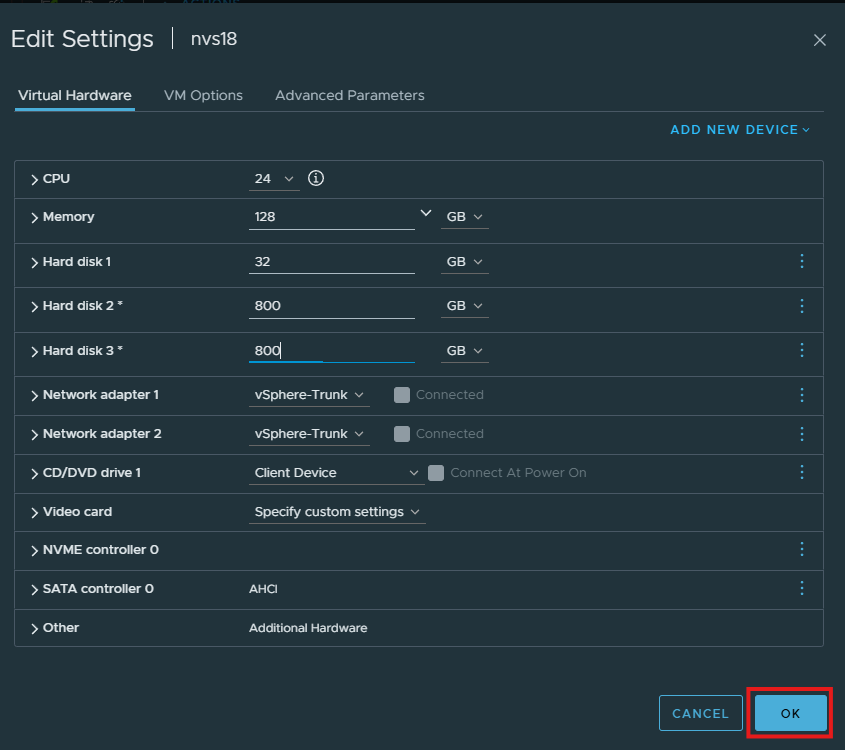
These hosts will be deployed under the Nested cluster, as you see above I have 1 Dell Host for this. Right click on the host and select Deploy OVF Template/
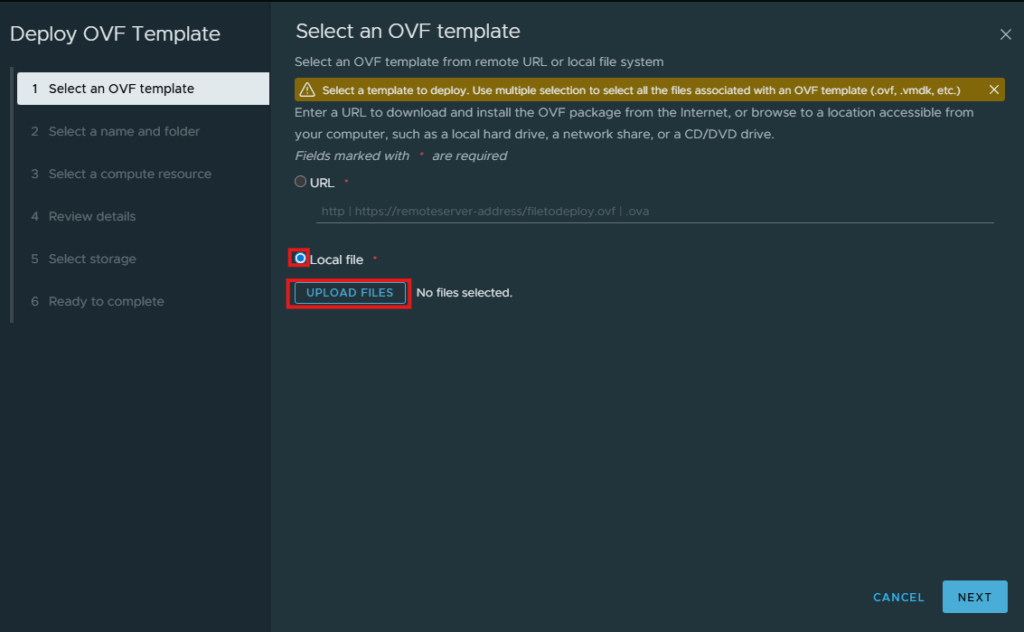
Click the radio button next to Local File and select Upload Files.
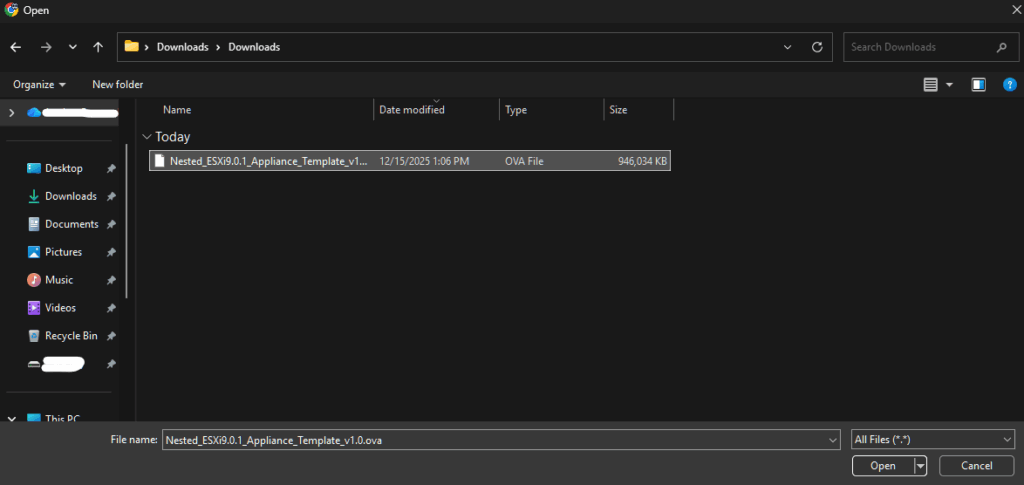
Select the OVA file you downloaded and click Open
Click Next
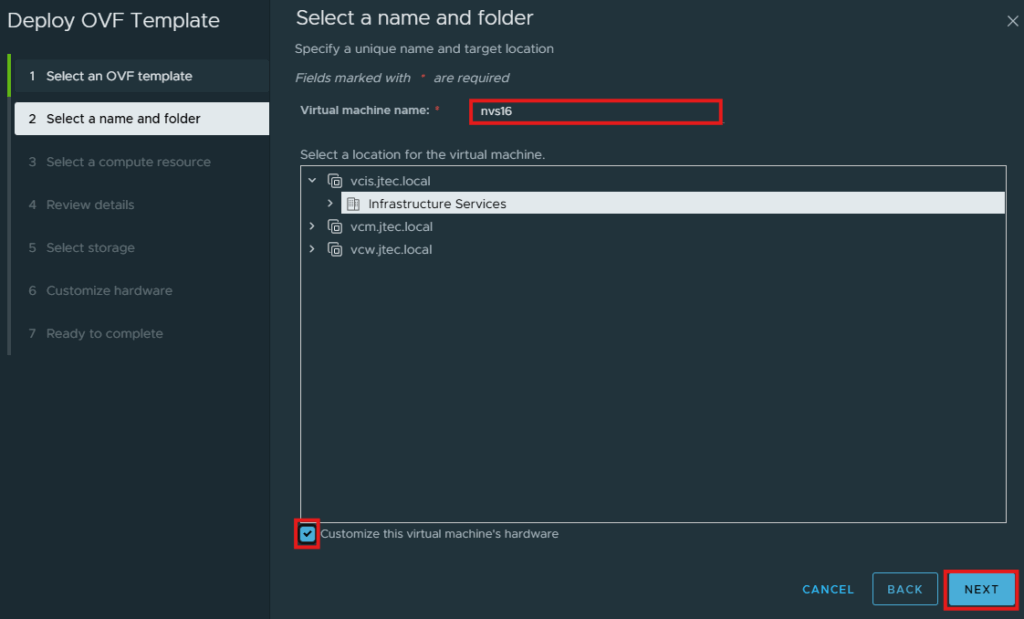
Input a name for the virtual esxi host and click the checkbox next to “Customize this virtual machine’s hardware”. Then click Next.
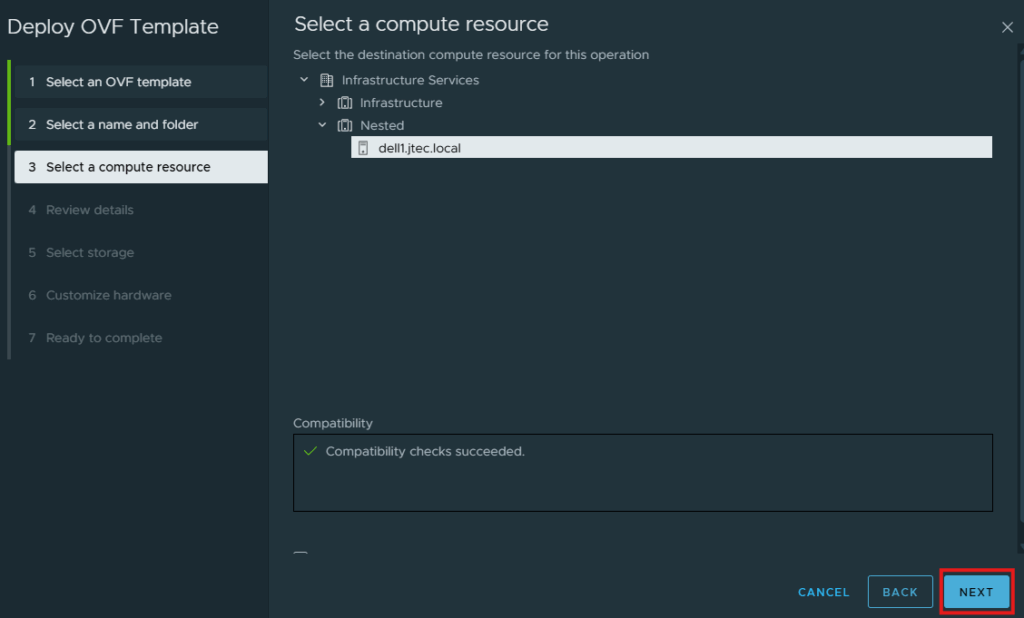
At the Compute Resource page, select the host you want to deploy the esxi host on and click Next.
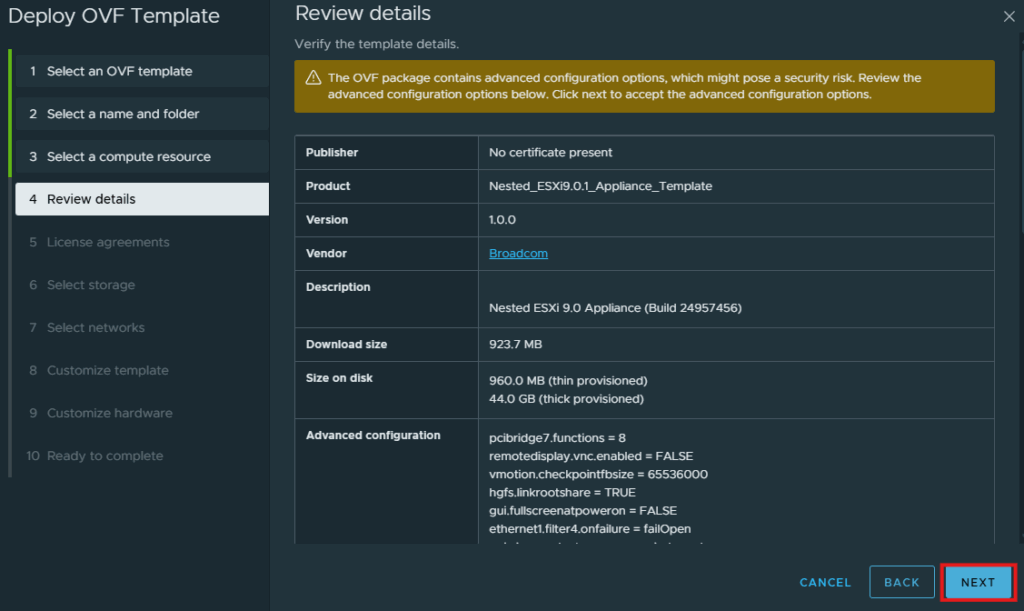
Click Next at the Review details screen.
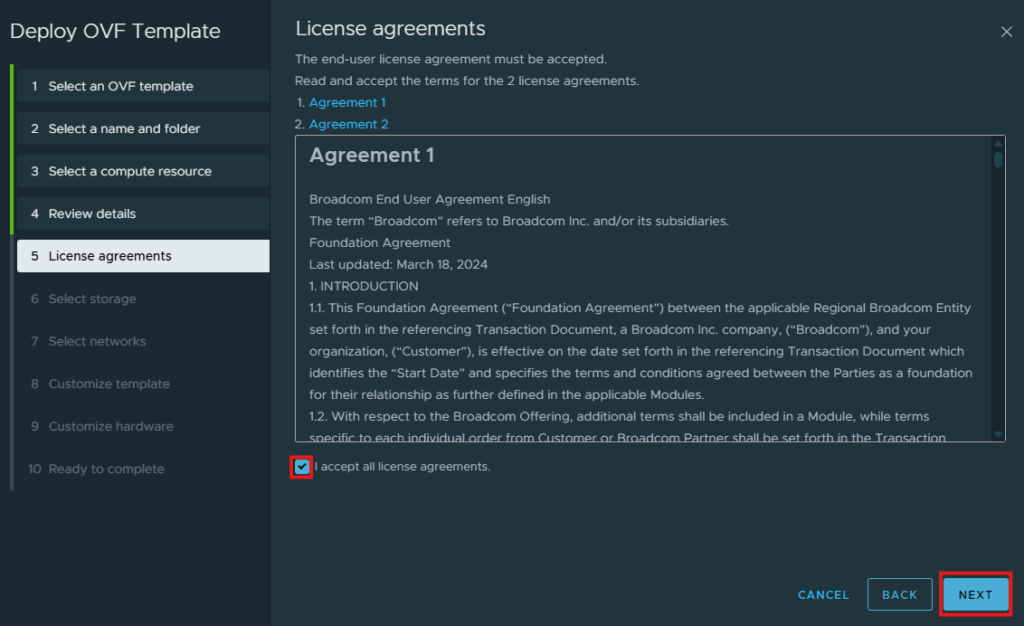
Click the checkbox next to “I accept all license agreements” and click Next.
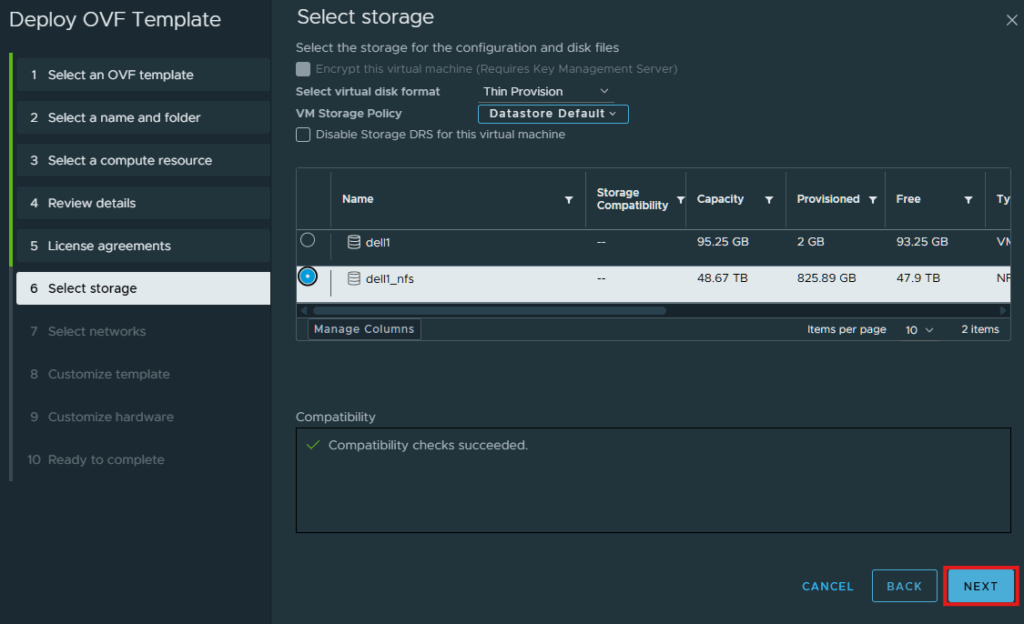
Select the storage location to deploy on and click Next.
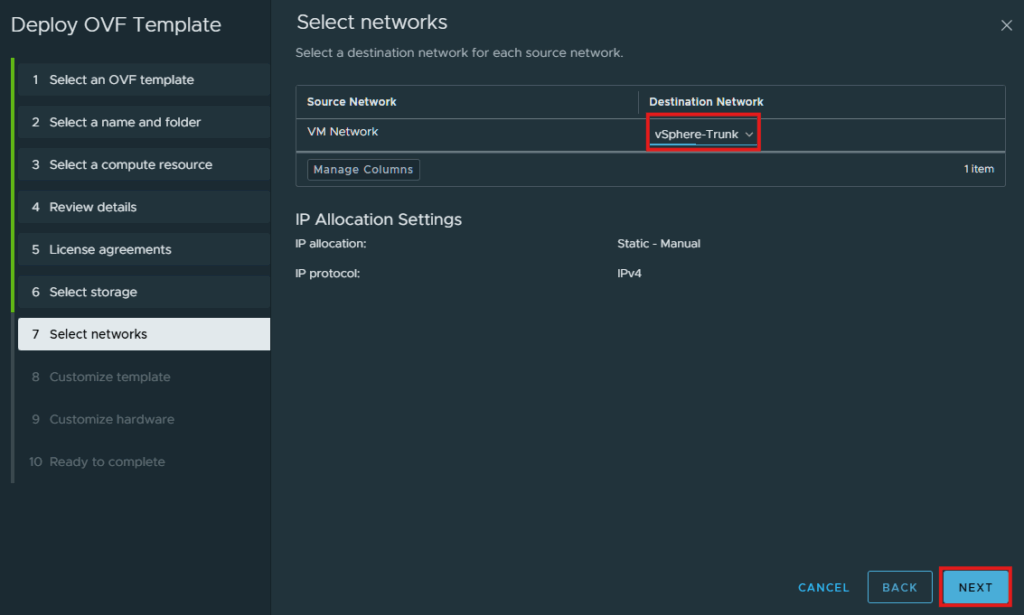
Click the dropdown to select your destination network for the esxi host and click Next.
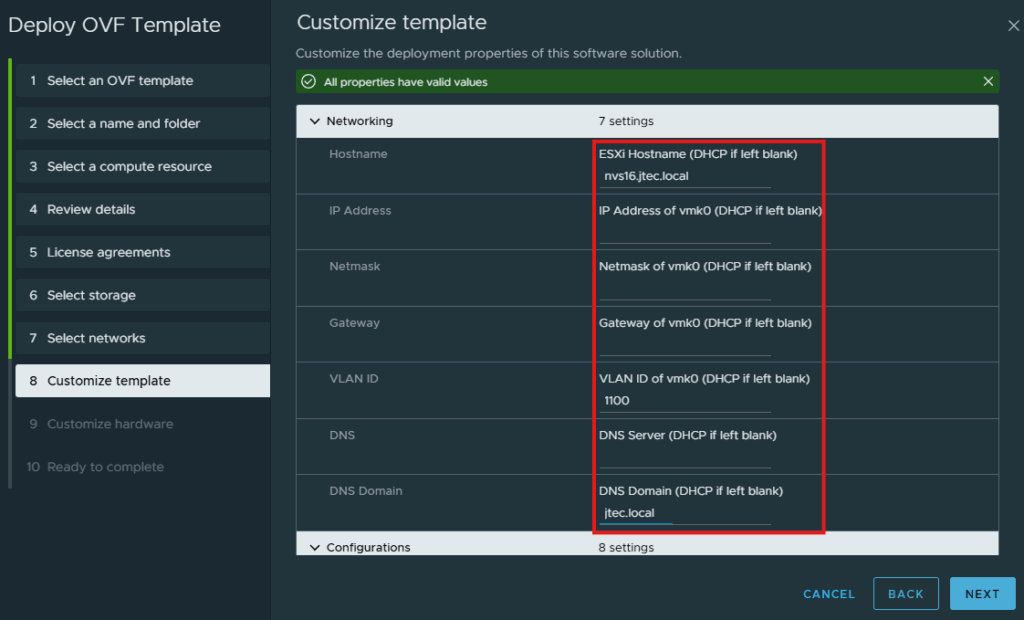
Enter in your networking information for the esxi host management networking.
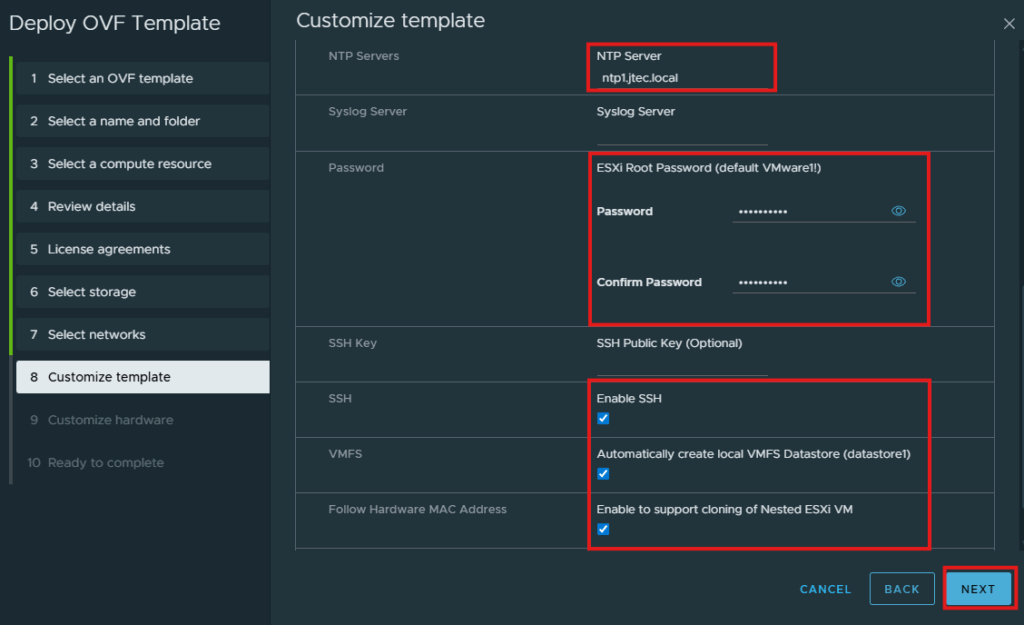
Enter in the configuration information you want to set. I also select the checkboxes for VMFS and Follow Hardware MAC address. Click Next to continue.
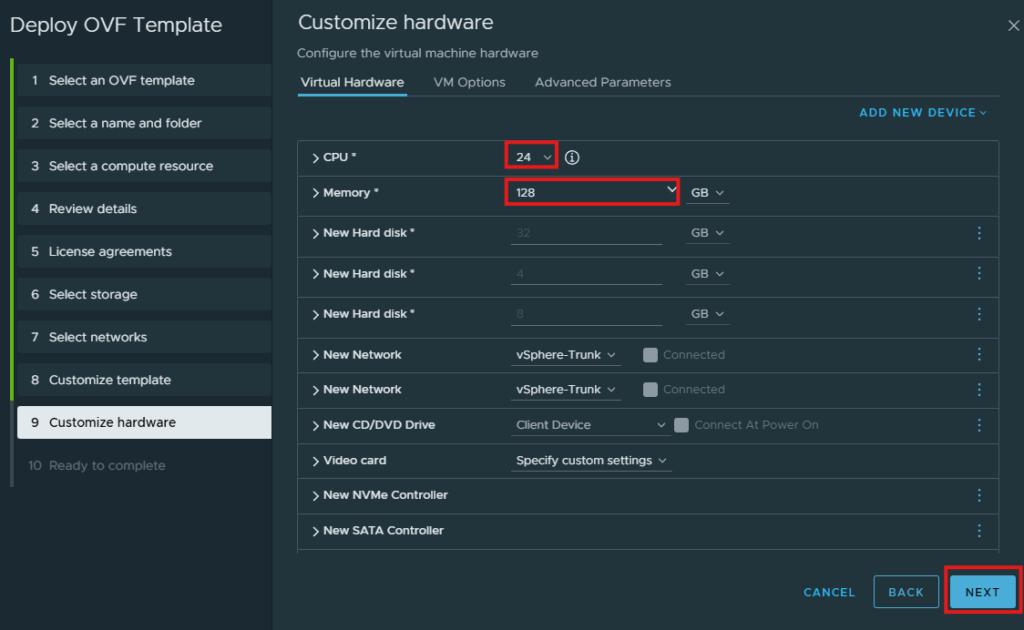
I like to set my CPU and Memory requirements during the deployment to save time later on, you can wait until after it has been deployed as well. I will go back and re-configure the 2 additional hard drives that are built as this will be used for vSAN.
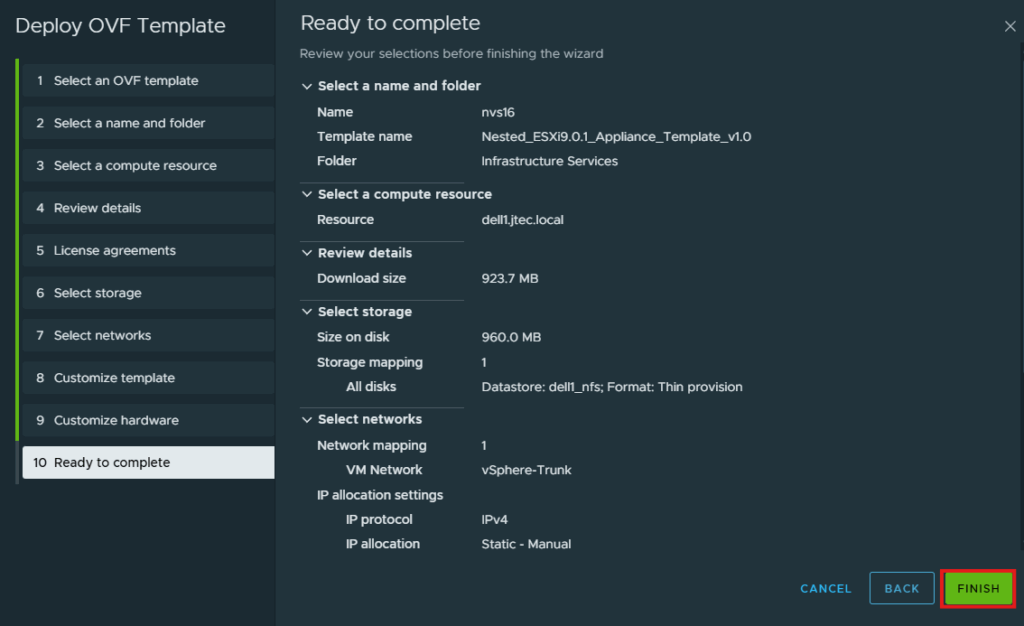
Review the information you entered and click Finish to deploy.
Once this esxi host is deployed, repeat the steps above to deploy 2 additional esxi hosts.
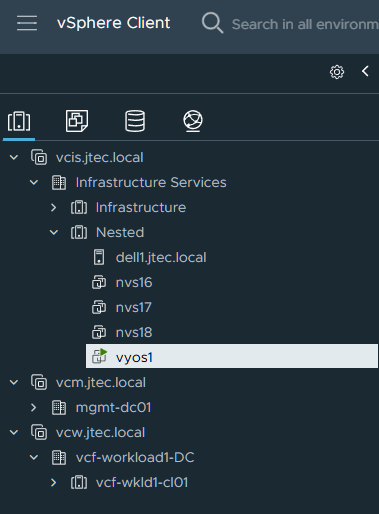
Now we can power on all 3 hosts and let them complete configuration. Right click on a nested esxi host and select Power > Power On.
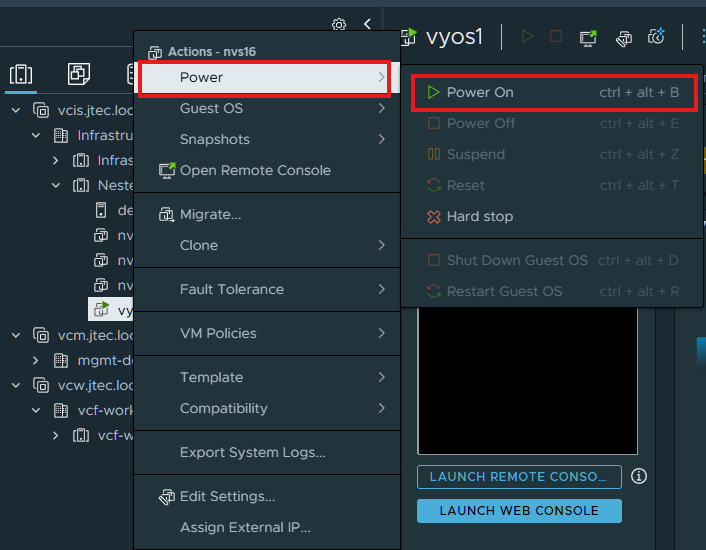
Repeat for the other 2 nested esxi hosts.
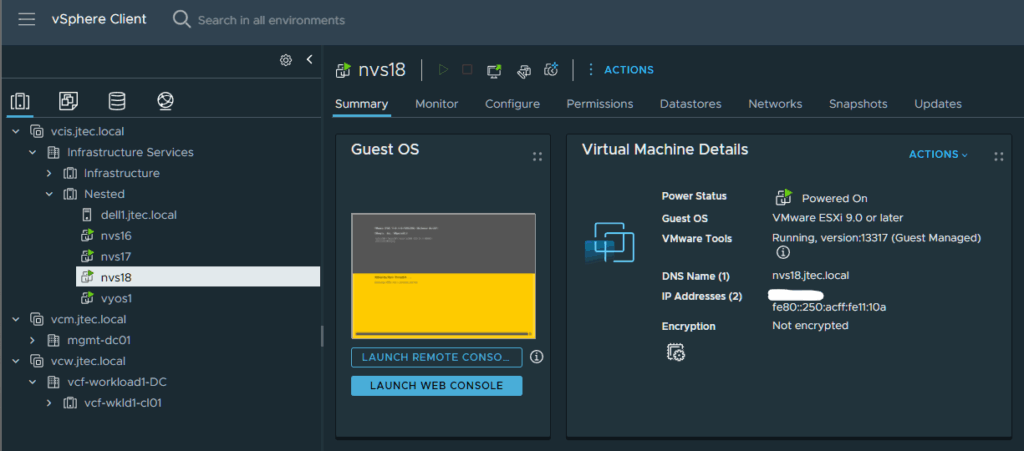
Now we have to wait for the configuration to complete, I will watch the last powered on hosts and check for the hostname change to what was setup during deployment. These hosts will reboot a couple of times to complete the deployment process.
Now we need to modify the hard drive space on these hosts, I like to power them off and complete this. Right click on the esxi host and select Power > Shutdown Guest OS. This can also be completed without powering off and rescan the storage.
Right click on a nested esxi host and select Edit Settings.
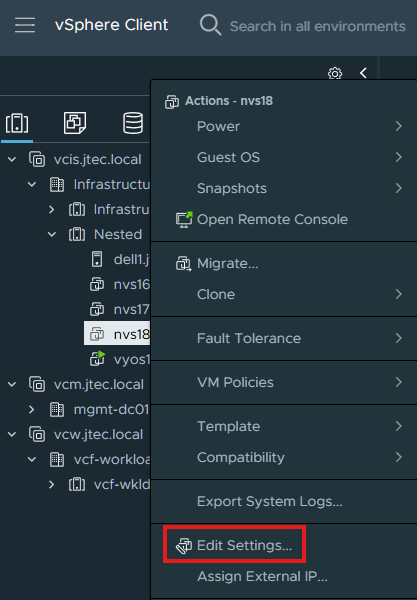
Modify the size for Hard disk 2 and Hard disk 3, I am going to make each drive 800 GB so that they will match when I enable vSAN ESA. Click Ok
Repeat this for the 2 additional hosts and power on the hosts again if you turned them off.
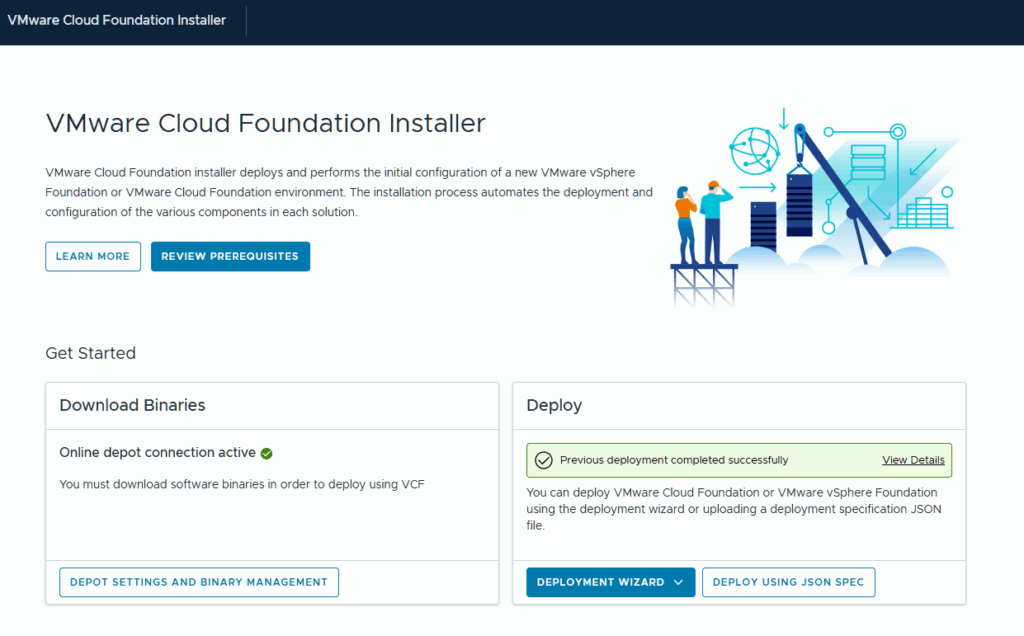
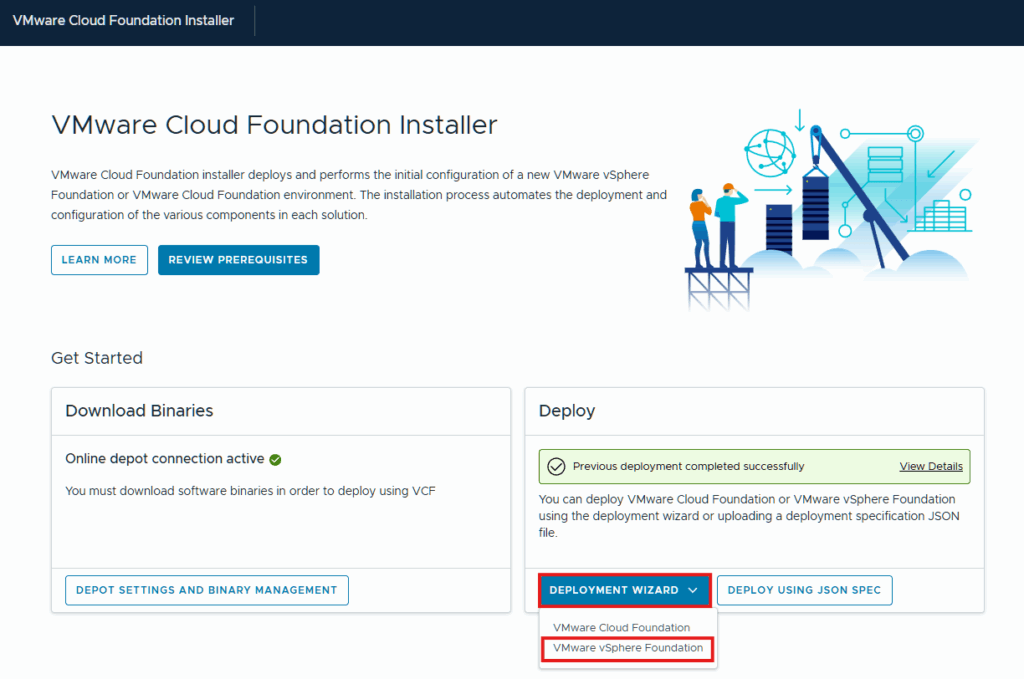
Now that we have 3 nested esxi hosts configured and deployed, we can build the VVF instance. To complete that we login to our VCF installer appliance.
If you don’t have this deployed, please follow this post here. You will also need an offline depot or upload the binaries manually. Here is a post I’ve referenced for deploying the offline depot before.
Click the dropdown for Deployment Wizard and select VMware vSphere Foundation.
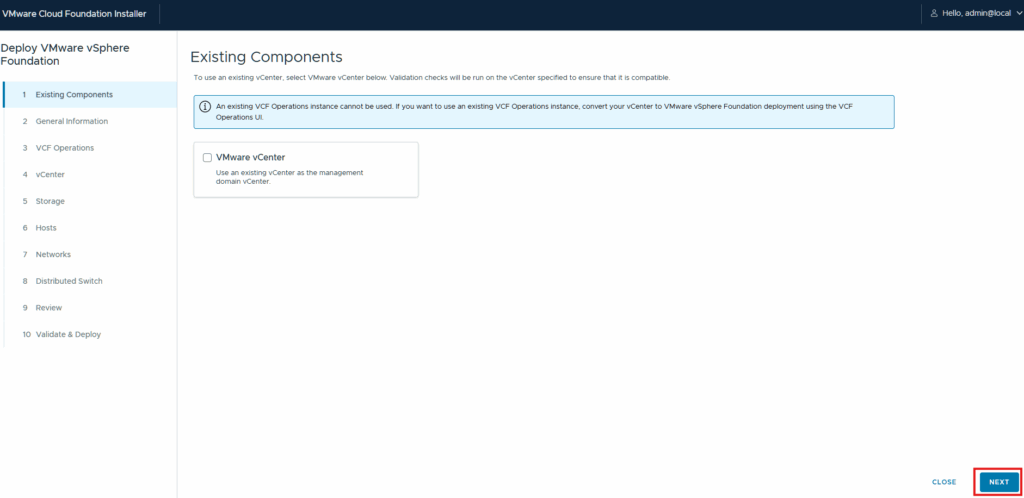
I will not be using any existing components so I click Next to continue the deployment wizard. If you have a vCenter deployed already you can input that information here.
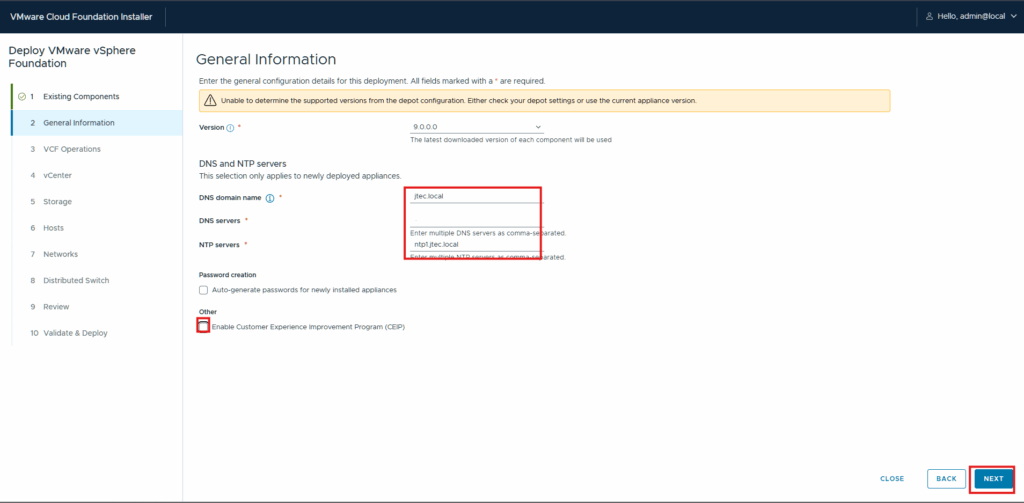
At the General Information screen, enter in your DNS domain name, DNS servers, NTP server and I always unclick the check box for Customer Experience Improvement Program (CEIP). Click Next
Enter in the information for you VCF Operations appliance, this is a new deployment. I am going to keep the appliance size as Small since this will be a small test environment, make sure the hardware requirements will suffice for what you intend for your environment. Click Next to continue.

Enter in the information for the vCenter deployment (FQDN, appliance size, datacenter, cluster, SSO domain name and passwords) and click Next to continue.

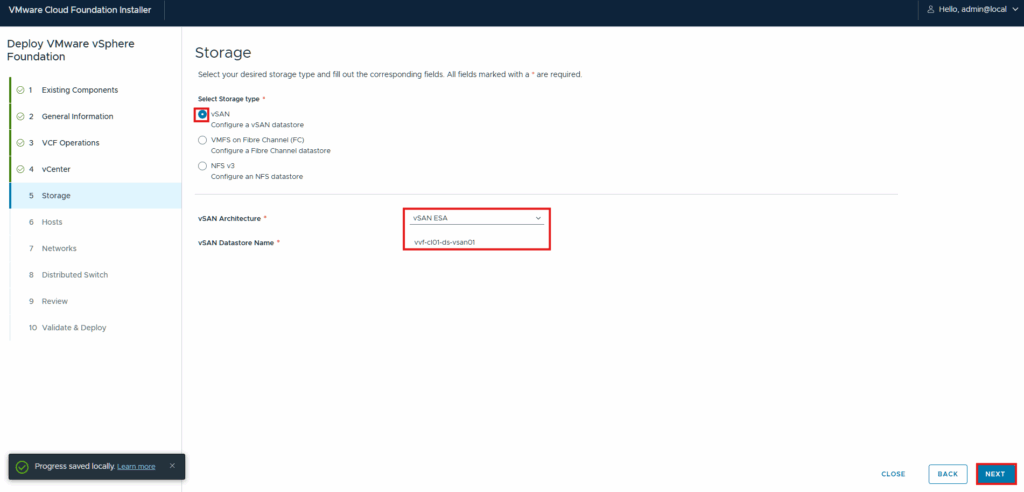
At the Storage screen, I am going to use vSAN ESA so I will leave the defaults selected and enter in the datastore name. If you wanted to use vSAN OSA, change the drop down for architecture or select the appropriate storage configuration for your environment. Click Next.
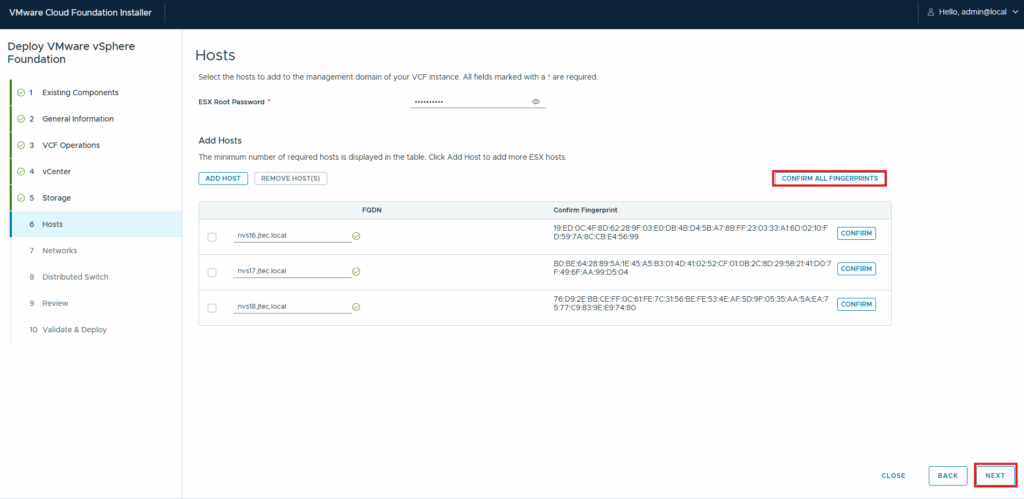
Input the ESXi host root password and the FQDNs for each host. Ensure you click Add next to each host so that it will pull the fingerprints.

Click Confirm All Fingerprints and click Next
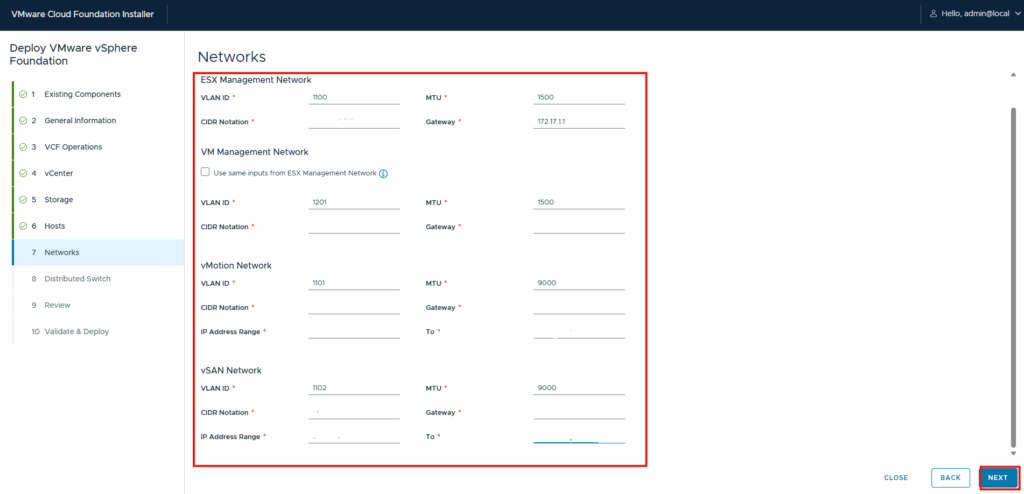
Enter in the network information for this environment, you will need subnets for vMotion, vSAN and ESX management. I also like to use a separate subnet for VM management but you can use the same as the ESX hosts. Click Next to continue.
See my subnetting post listed above for how I separated my subnets
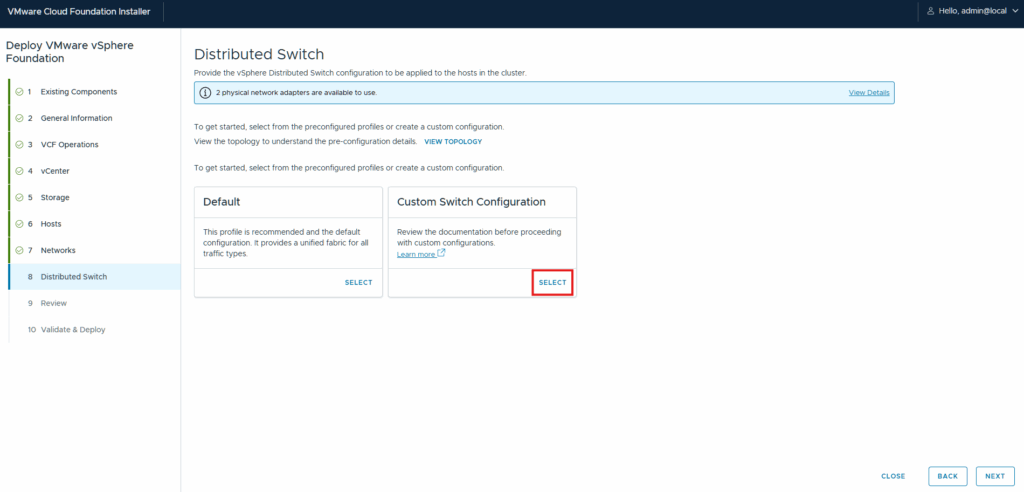
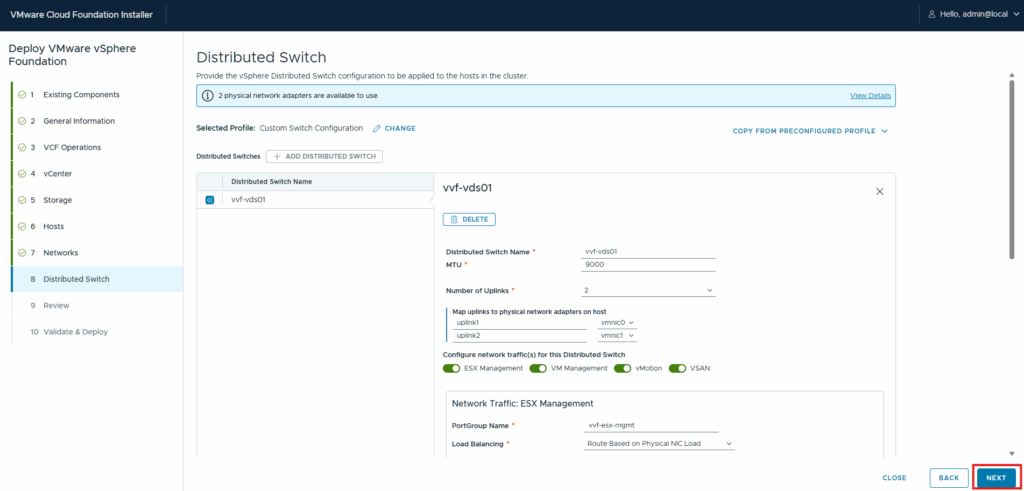
I like to configure the names of my distributed switch port groups so I will be clicking Select on the Custom Switch Configuration. If you aren’t concerned you can use the default switch.
In the custom distributed switch configuration, I start by clicking Copy From Preconfigured Profile and select Default to save time.
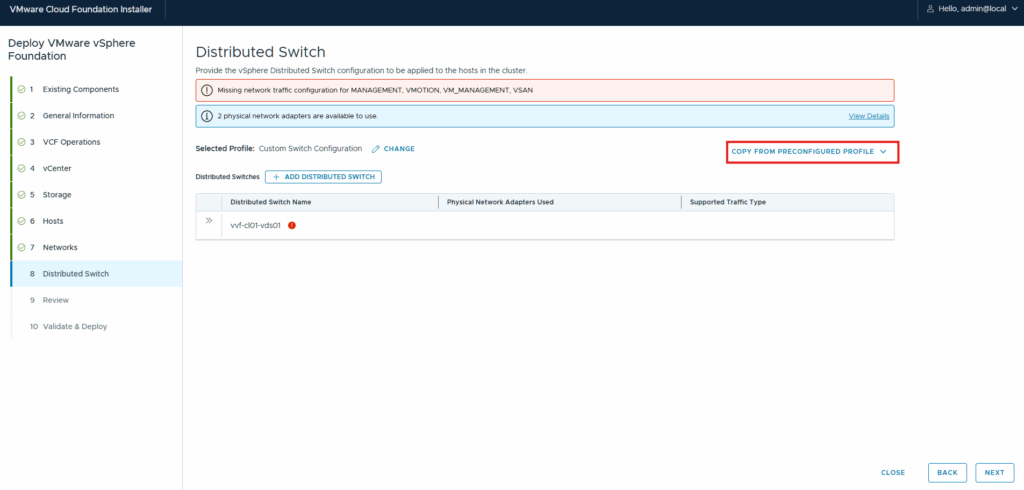
Now I go in and change the names to what I want them to save for each portgroup and click Next You can also change the uplinks, load balancing, and vmnic configuration if you want to. I leave the defaults for this as these are the best practices.
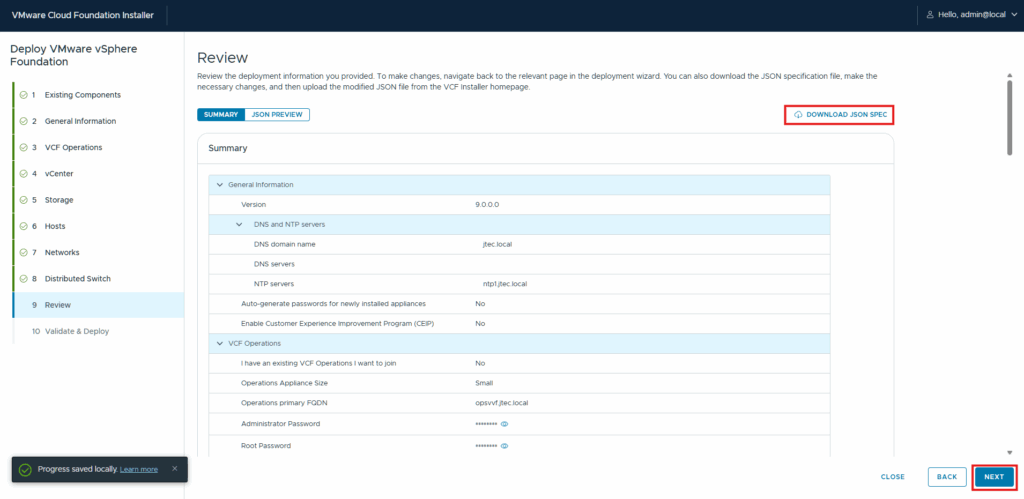
At the Review screen, this is your chance to review what you inputted and confirm before the deployment. If you plan to rebuild this lab in the future you can click Download JSON Spec to save you time later on. I usually re-deploy my labs every few months so I save the JSONs each time I build a new environment.
Click Next to continue.
The VCF Installer appliance will validate the information we inputted to confirm it is ready for deployment.
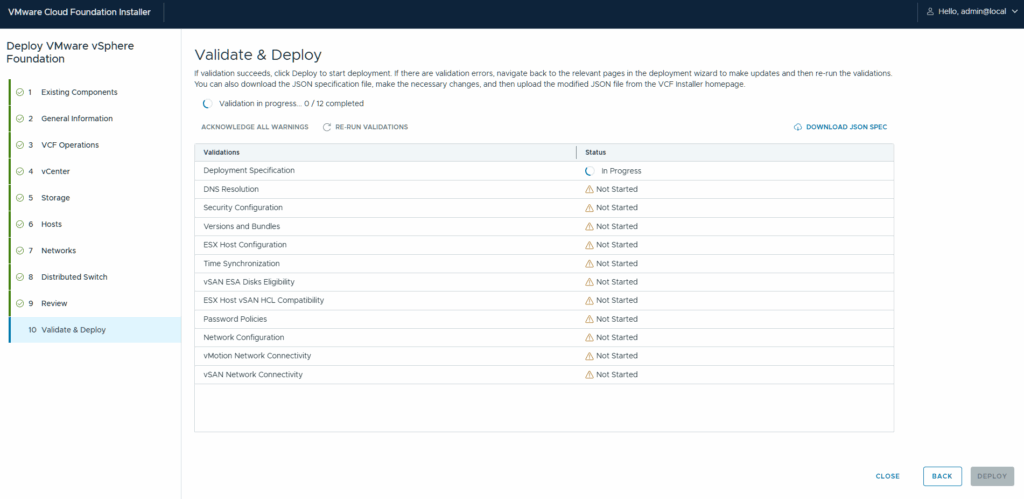
If you run into an error where the ESX Host vSAN HCL Compatibility check fails, check out William Lam’s post on how to fix that.
After the validation has completed, review any errors that appear and resolve them. Then re-run the validation until you are able to proceed with deployment. Click Deploy to have the VCF installer build the VVF environment.
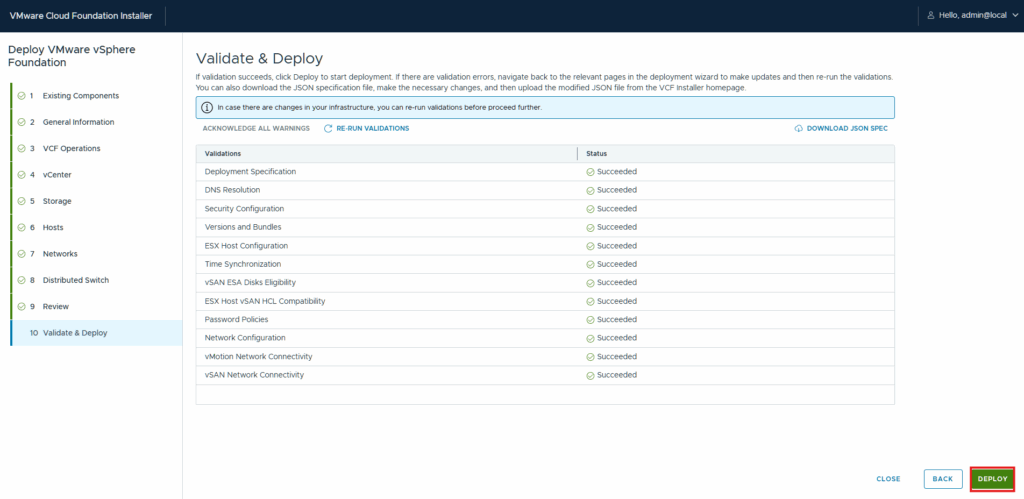
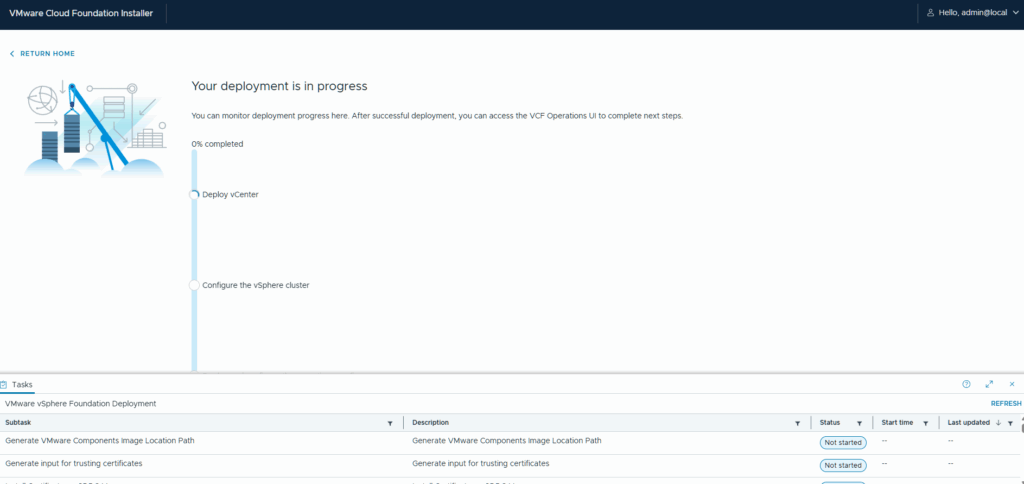
The deployment will start with the vCenter being deployed, you can follow along with the progress.
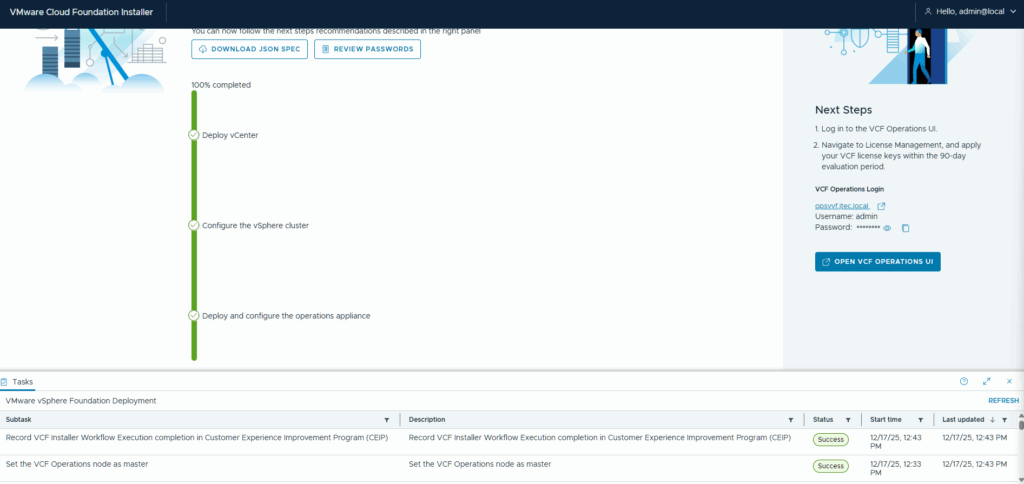
Once the deployment is completed you can open the VCF Operations gui to start using this setup.
This completes the VMware vSphere Foundation deployment, I will end up scripting this out at some point and making it easier for me to build this lab again. In another post I will go over the deployment via script method and further details on it.