
Deploy an External VCF Identity Broker
Follow VCF Identity Broker deployment through Fleet Management, including certificates, network settings, cluster inputs and prechecks.
Overview
I deployed an external VCF Identity Broker through Fleet Management to practice the setup in my VCF 9 lab. This walkthrough covers certificates, infrastructure, node configuration and prechecks before configuring an identity provider and SSO.
For a lab environment the simple embedded identity broker would certainly suffice, but since I am going to be using this environment to help me with assisting customer deployments I wanted to get experience deploying the external broker.
Choose embedded or external appliance mode
I intentionally selected the external appliance deployment for this post so I could practice the full appliance workflow used for a broader VCF fleet. Embedded mode would have been sufficient for this single homelab environment. This is a learning and architecture choice, not a claim that the external design is required for every lab.
| Consideration | Embedded | External appliance |
|---|---|---|
| Placement | Integrated with the management-domain vCenter Server. | Runs as a separate three-node Identity Broker appliance cluster in the VCF 9.0 workflow shown here. |
| Intended scope | Smaller environments that do not need identity services across a fleet of VCF instances. | Higher scalability and resiliency; Broadcom describes this option for identity services across a fleet of up to five VCF instances. |
| Additional infrastructure | No separate broker VM cluster, VIP, node IP pool, datastore or broker appliance placement to plan. | Requires vCenter/cluster/datastore/network placement, three node addresses, a cluster VIP, node-name prefix, appliance credentials and sufficient resources for the selected deployment profile. |
| Shared prerequisites | A supported VCF 9 environment, a supported identity provider or directory service, administrative access, working DNS/NTP and the connectivity and trust required between VCF components and the identity source. | The same identity-source and component prerequisites, plus appliance-specific name, address, certificate, placement and network inputs. |
| Mode selection | Cannot be enabled on the same VCF instance at the same time as appliance mode. | Cannot be deployed for a VCF instance that already has embedded mode enabled; changing modes requires resetting the existing SSO configuration and planning the impact first. |
| Availability and recovery | Depends on the management vCenter hosting the embedded broker. | Three nodes provide appliance-level resiliency, but still require backup, lifecycle, certificate, DNS and failure-domain planning. |
See Broadcom’s VCF 9 SSO deployment-mode overview. Broadcom KB 413884 documents that embedded and appliance modes are mutually exclusive for one VCF instance.
External appliance prerequisites
Before starting the appliance workflow, prepare the following inputs. The values visible in my screenshots are lab examples; use values reserved for your own environment.
- Deployment and placement: selected VCF Identity Broker version and profile, target vCenter, management cluster, datastore, network, folder and resource pool. Confirm capacity and failure-domain placement for all three nodes.
- DNS and IP plan: broker service FQDN, three unused node addresses, cluster VIP, subnet mask/prefix, gateway, DNS domain and search path, and reachable DNS servers. Create the required forward and reverse records and verify resolution from the management network before deployment.
- Time and connectivity: reachable NTP servers with synchronized time, plus the routing and firewall paths required among VCF Operations/Fleet Management, vCenter, the broker nodes, VCF components and the chosen identity provider or directory.
- Certificate: a certificate covering the broker service name and every name required by the deployment wizard, with a trusted chain appropriate to the environment. The screenshots use a self-signed lab certificate. Broadcom documents a custom-certificate deployment issue in VCF Identity Broker 9.0.0/9.0.1 in KB 421347; check the behavior of the exact build you deploy.
- Identity and administration: a supported identity provider/directory, the provider metadata and credentials needed for its integration, local VCF administrative accounts for initial configuration, and a least-privilege role-assignment plan for users and groups.
- Mode state: confirm that embedded mode is not already configured for the target VCF instance. Do not reset working SSO merely to follow this guide without an access and rollback plan.
Passing the appliance precheck validates the deployment inputs it examines; it does not prove that identity-provider login, group provisioning or component role assignments work. Test those separately after the broker is deployed.
Start Identity Broker deployment
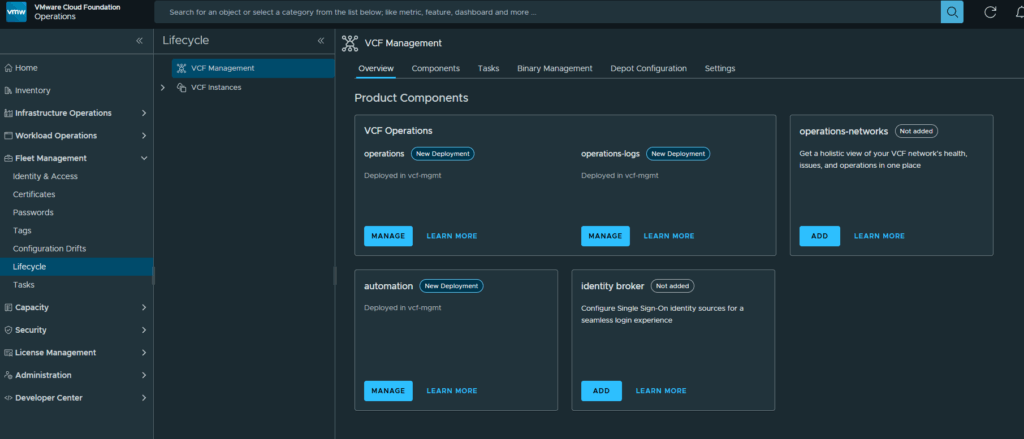
We first need to login to the VCF Operations web gui, expand Fleet Manager and click on Lifecycle
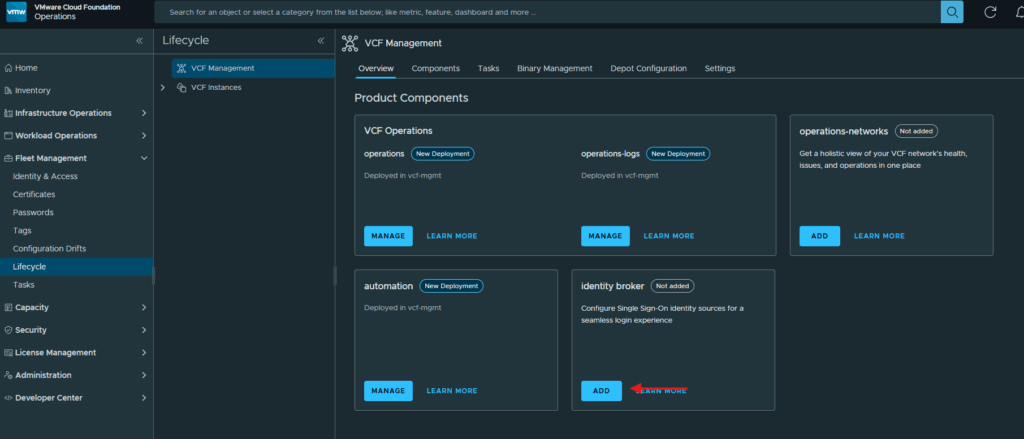
Click on Add underneath Identity Broker
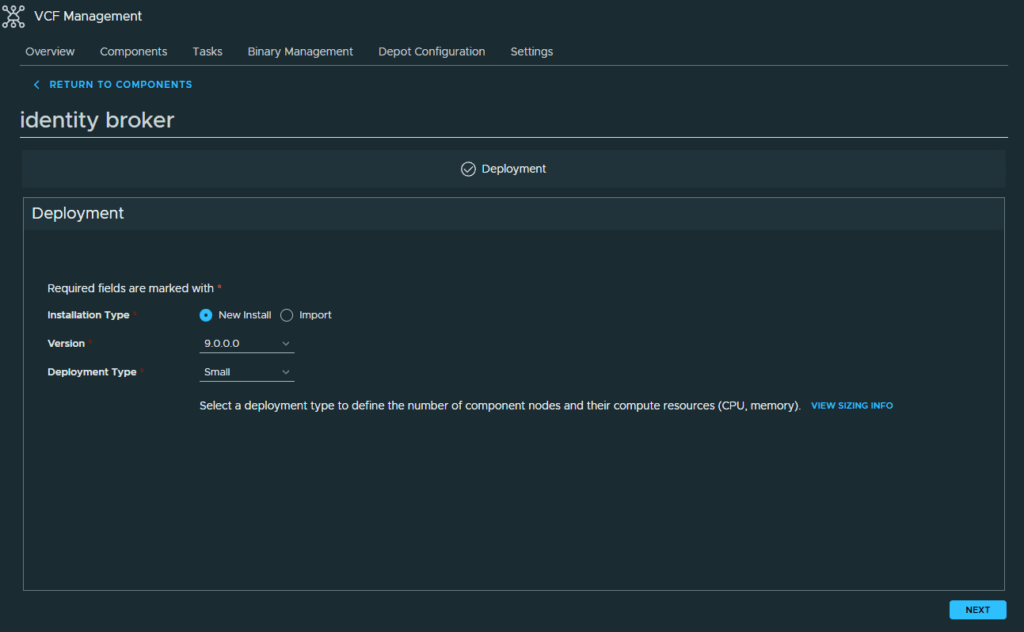
At the Deployment screen, I am selecting to do a new install and deployment type of small which is the only option. Click Next to continue
Configure the certificate and infrastructure
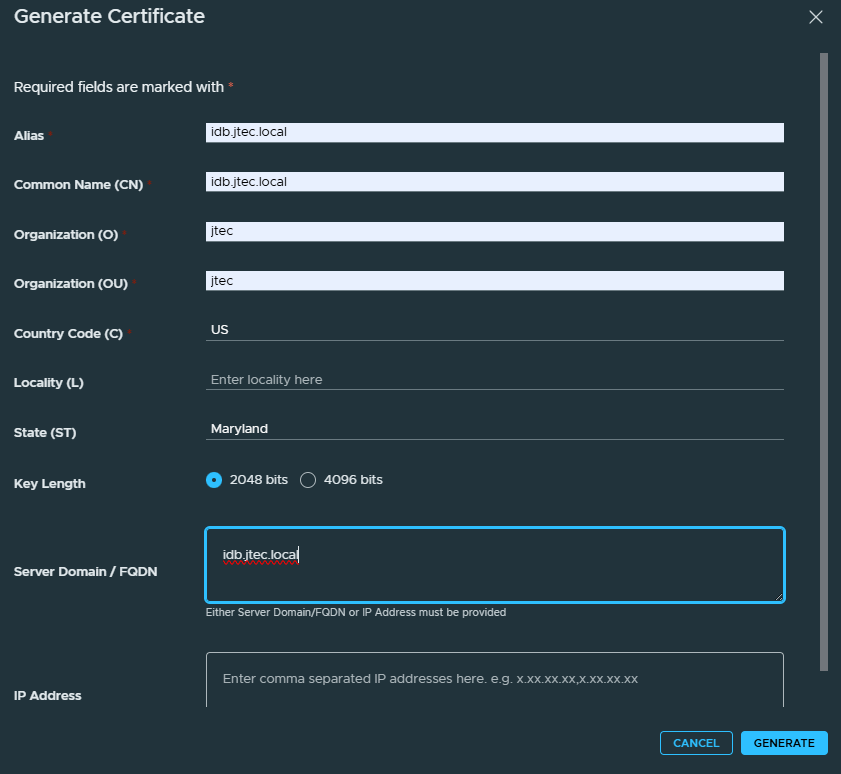
I need to generate a self-signed certificate, click on the Plus symbol and select Generate Certificate
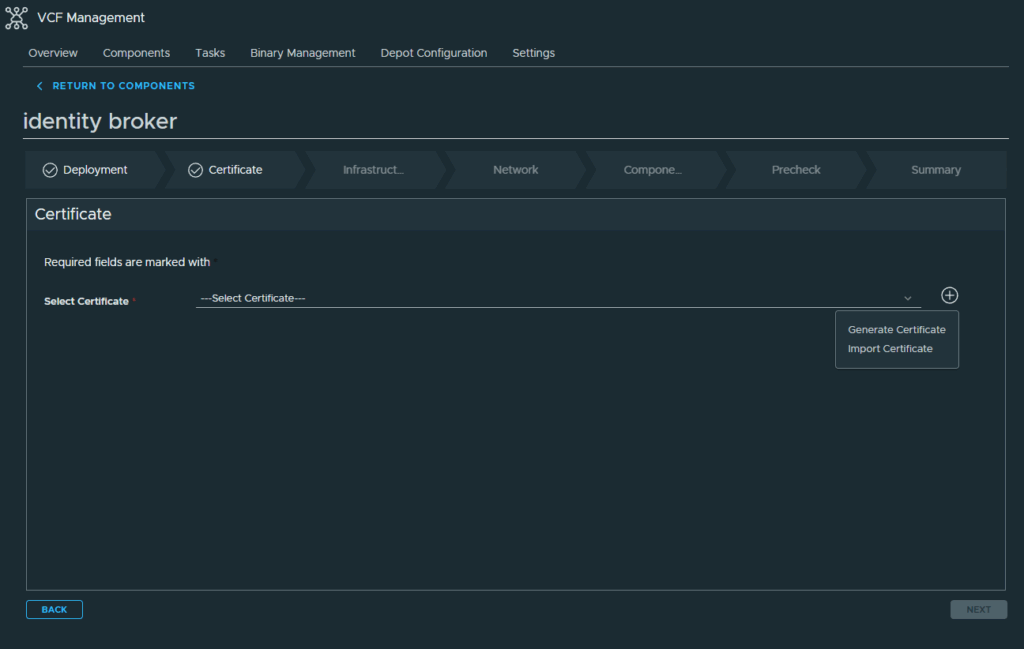
Enter in the required information in the Generate Certificate pop-up and click Generate to create the certificate.
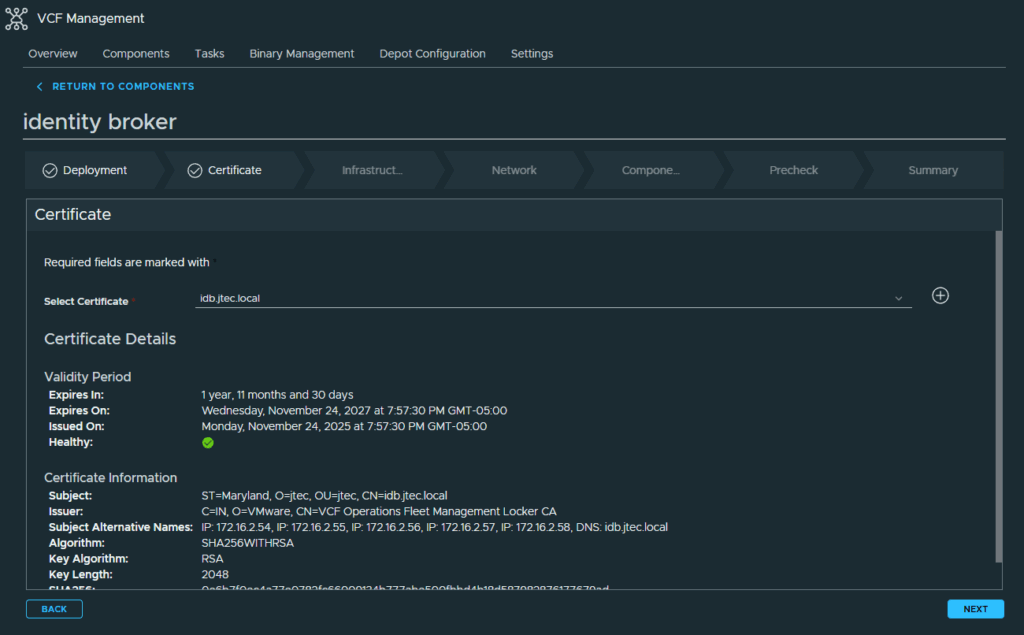
Select the newly created certificate in the drop down and click Next
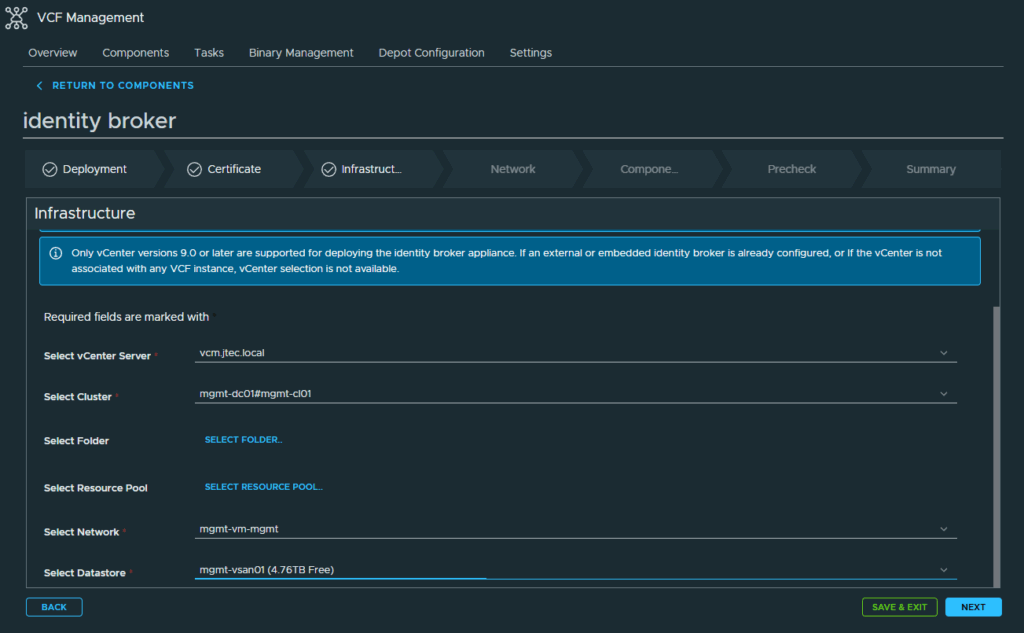
Input the required information at the Infrastructure screen and click Next
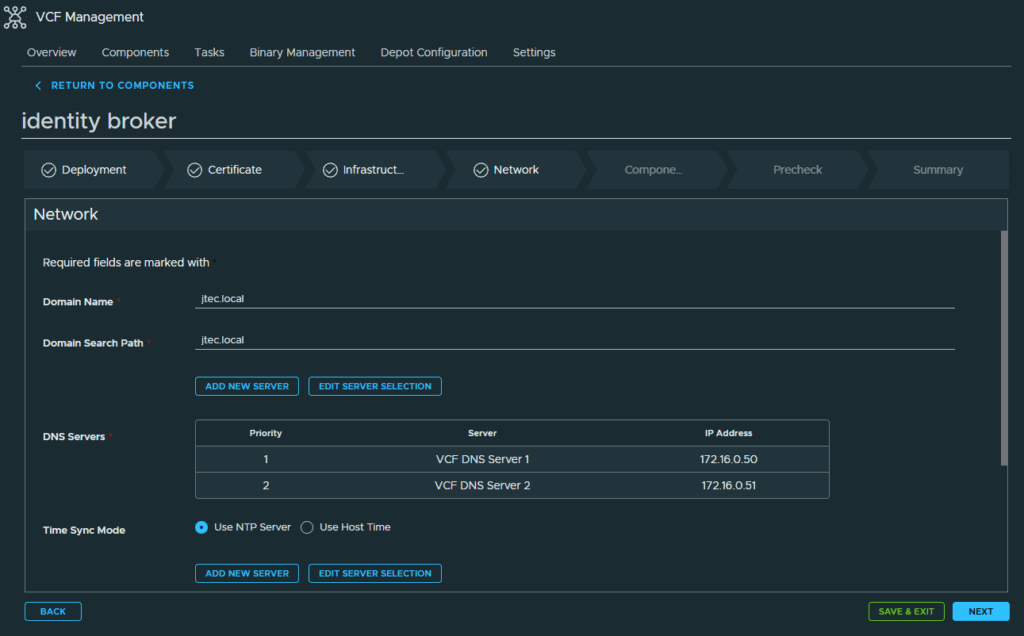
At the Network screen, enter in the domain, DNS and NTP settings along with the gateway and netmask. Click Next to continue
Configure the broker nodes
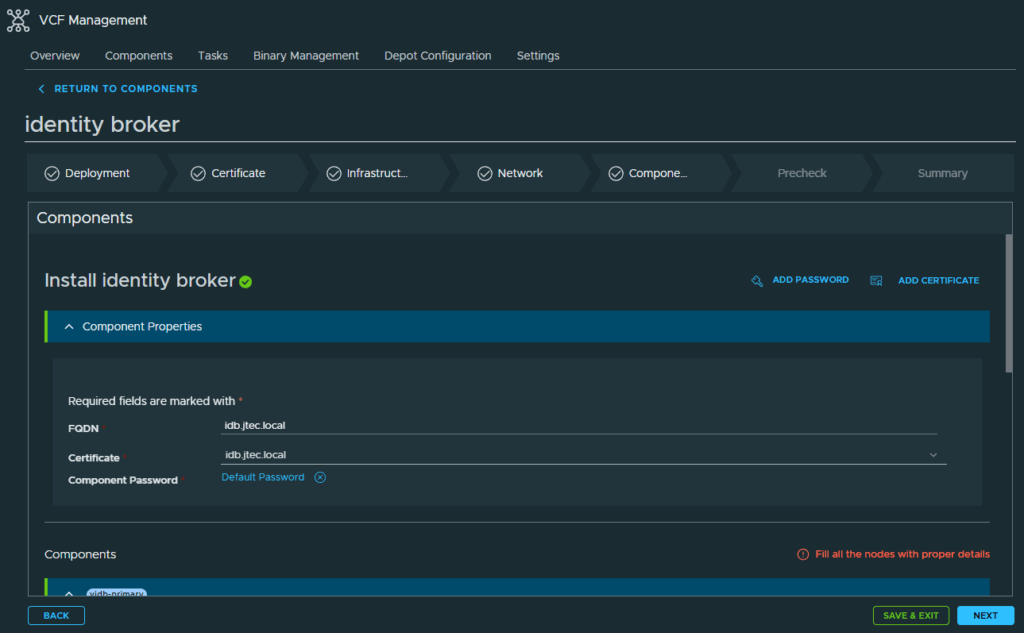
For the Components screen, enter in the FQDN, node prefix, cluster VIP and cluster node IP Pool information and click Next.
Validate and deploy
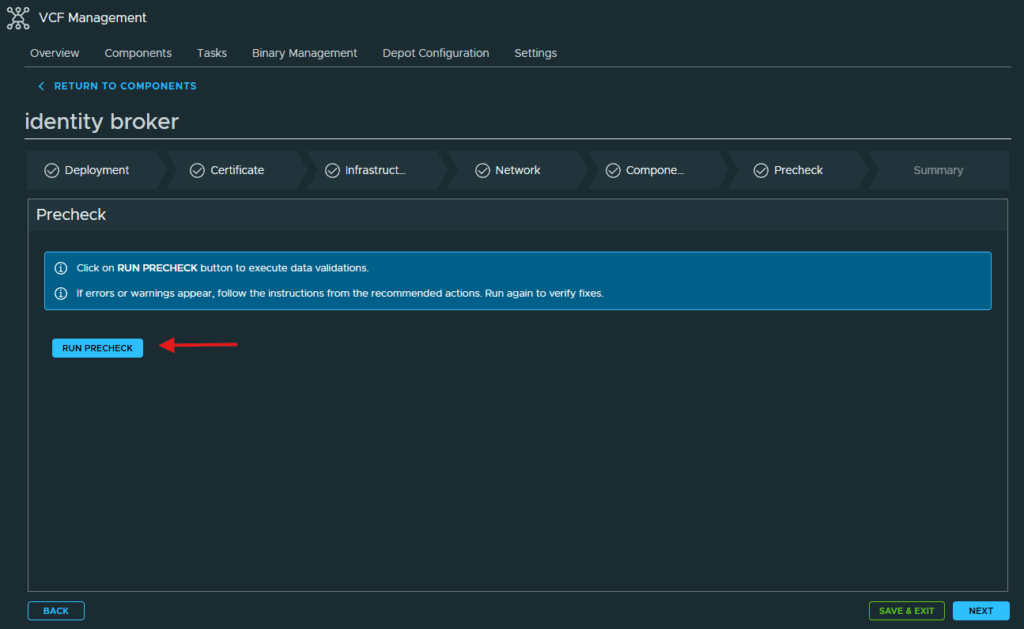
Click on Run Precheck
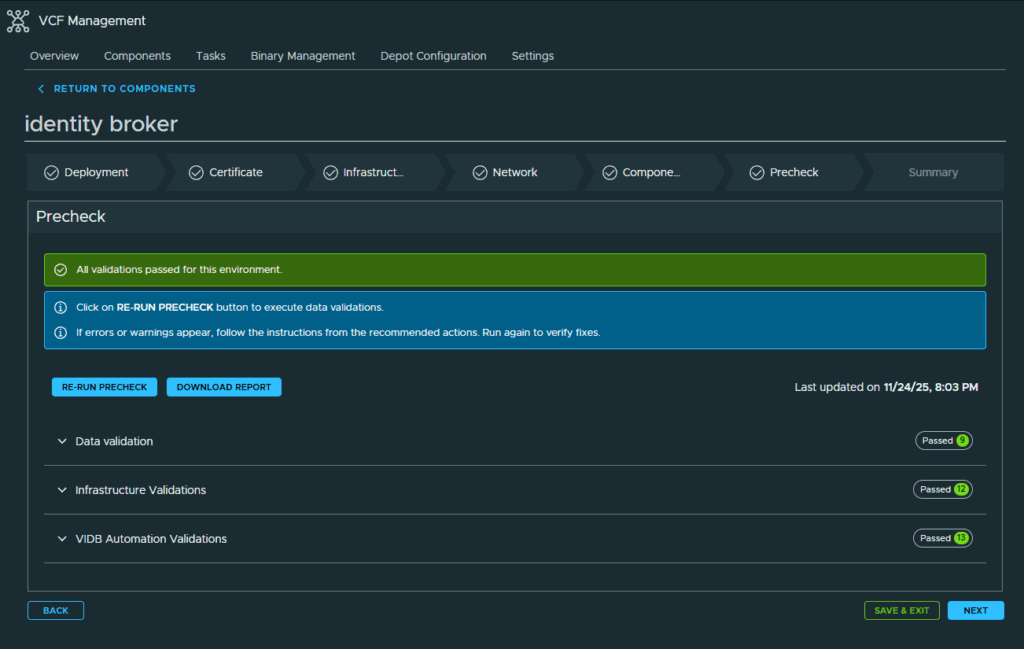
After the Prechecks have completed and passed, click on Next to continue. If you have any errors, address them and re-run the Precheck.
Review all the information you entered in the Summary page just to confirm prior to deployment and if everything is correct, click Submit
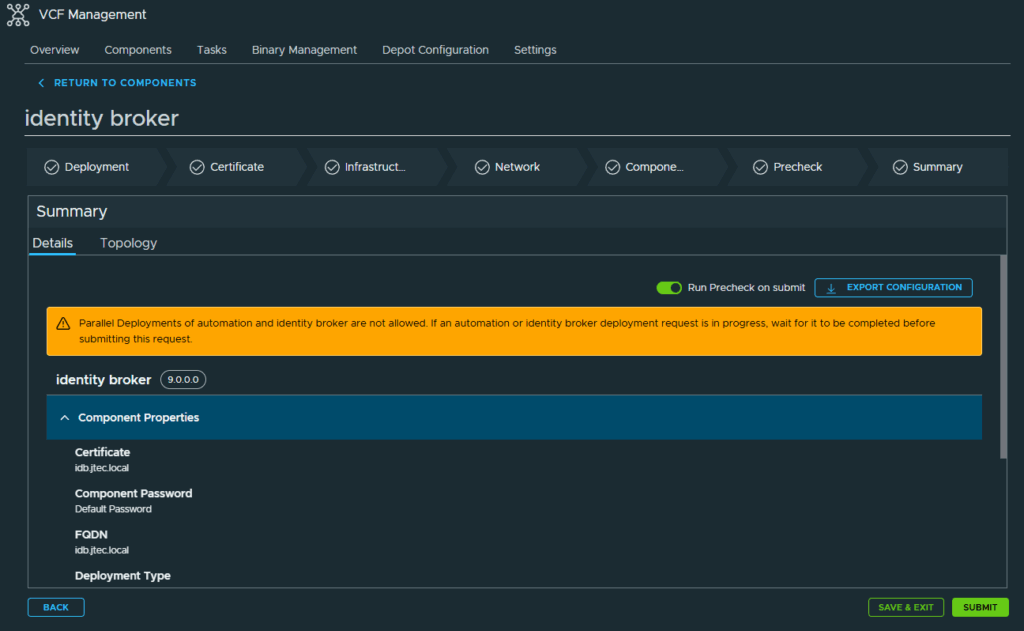
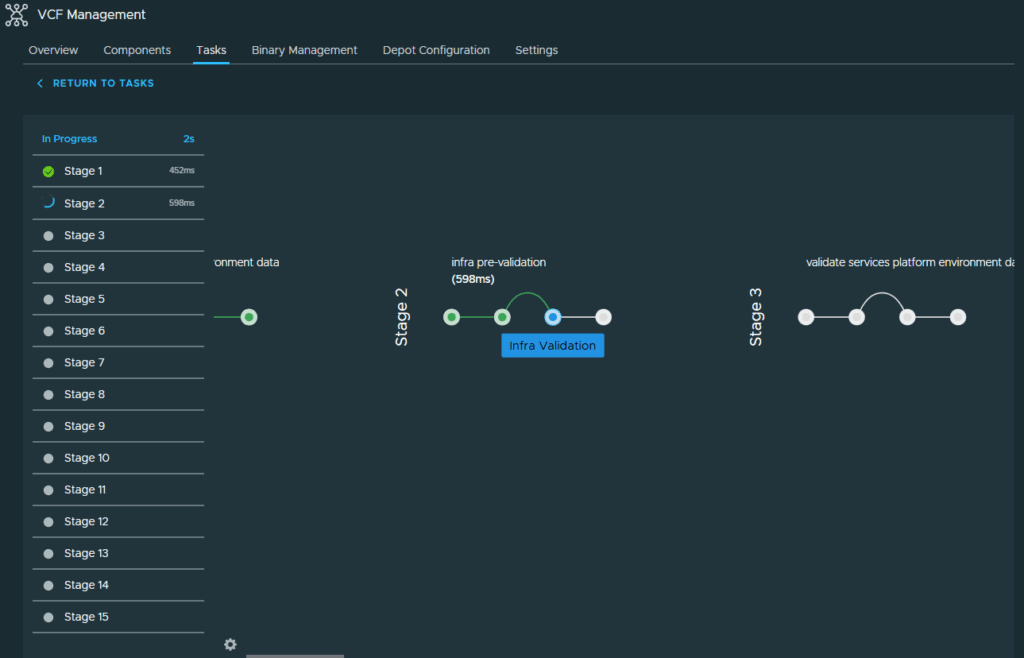
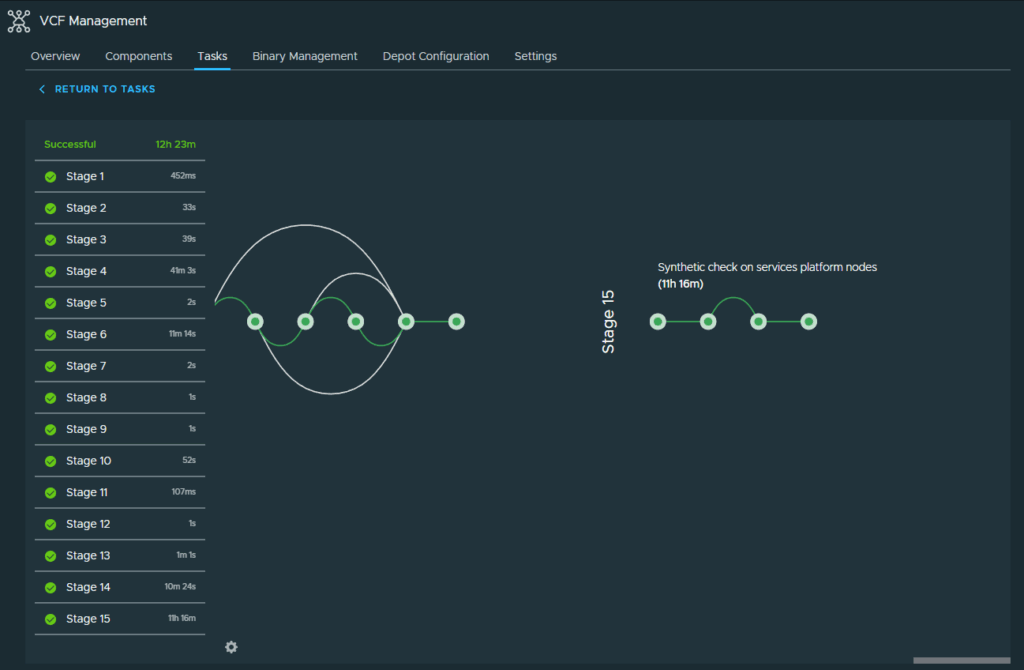
The deployment process will start. This will create a cluster of 3 identity broker nodes in your environment.
With the Identity Broker deployed, we can move on to configuring single sign on. I will be cover this in another post.
You can return to my main VCF Lab page to follow along with this deployment.